Download Our Free Tools
Workouts, nutrition guidance, and habit-building. Never wonder where you should put your limited time, energy, and effort.
Get our FREE Starter Kit with dozens of resources today!

It’s time to learn how to do a Turkish get-up!
I’m glad you want to learn it, as it’s a great functional exercise that will improve your strength and balance.
However, it’s also a bit of a technical movement, as there are quite a few steps to follow.
But have no fear! You’re in the right place to learn the Turkish get-up.
After all, it’s what we do best here at Nerd Fitness: making complex exercises simple for beginners.
Here’s what we’ll cover today:
Let’s get after it.
In the video above, Coach Staci walks you through proper technique with the Turkish get-up (TGU).
Staci demonstrates three versions of the TGU:
But there’s a lot to the move, so we’ll break it down for you.
Before we do, it’s worth pointing out that Staci is a coach here at NF!
Yep, we’re lucky to have her on the team.
When she’s not busy making videos on complex exercises, she’s coaching nerds on how to grow strong and level up their nutrition.
Pretty cool, huh?
If you’re interested, you can learn all about our coaching program right here:
Here’s how to perform the Turkish get-up, step by step:
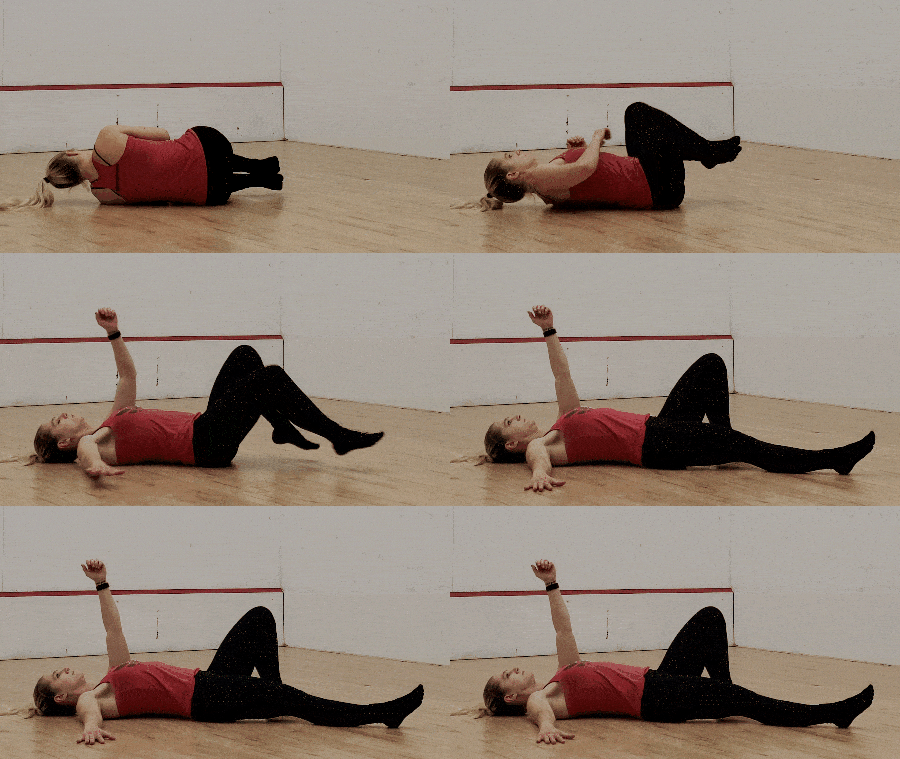
Begin in a supine position, extending one arm vertically while bending the same-side leg. This is our starting stance.
#1a) If Weighted, Roll onto Your Back and Extend the Arm
For those using additional weight, start on your side and pull the weight close with two arms. Roll onto your back, continuing to keep the weight close, then extend the weight overhead with both arms, taking your time and maintaining control.
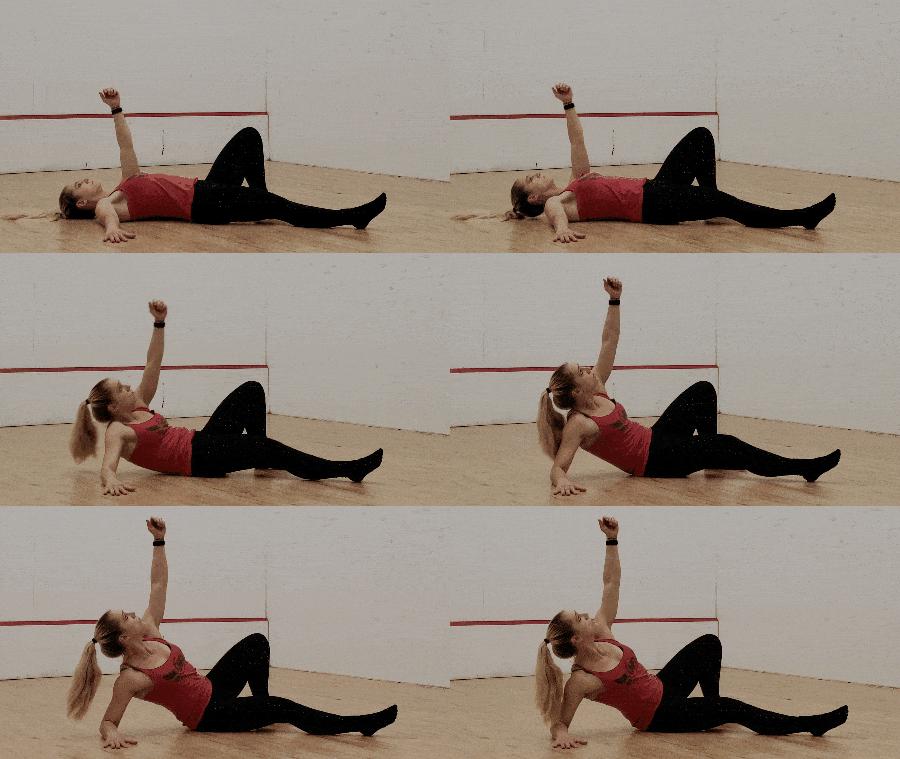
Maintain eye contact with the hand overhead as you roll from your back up onto your opposite forearm.
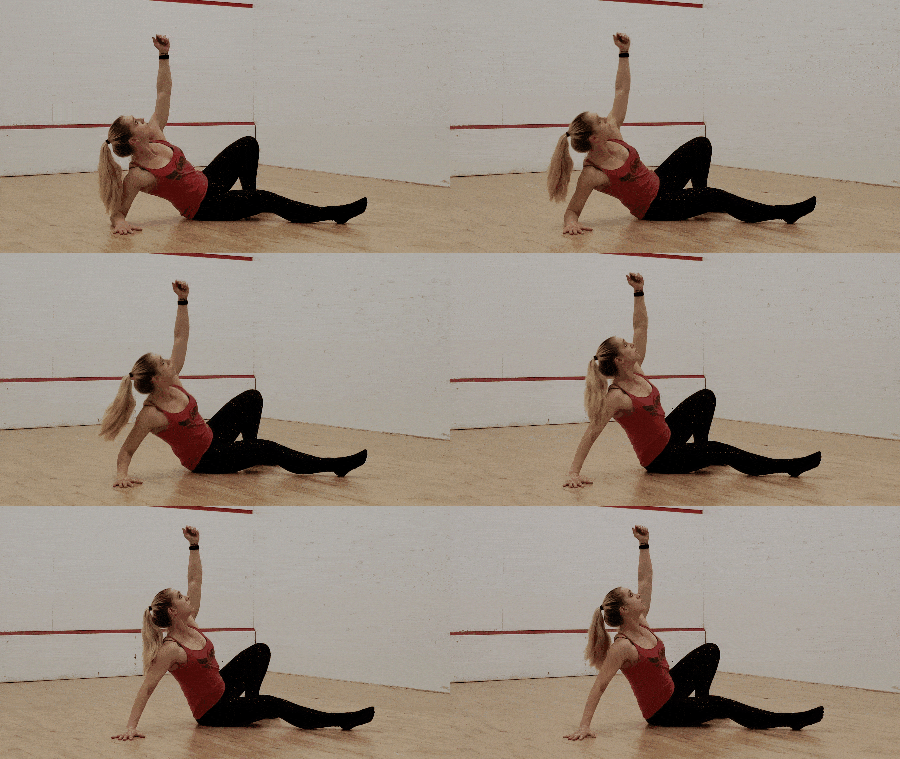
Continue the movement by getting up onto your hand, and maintaining eye contact with the other hand overhead.
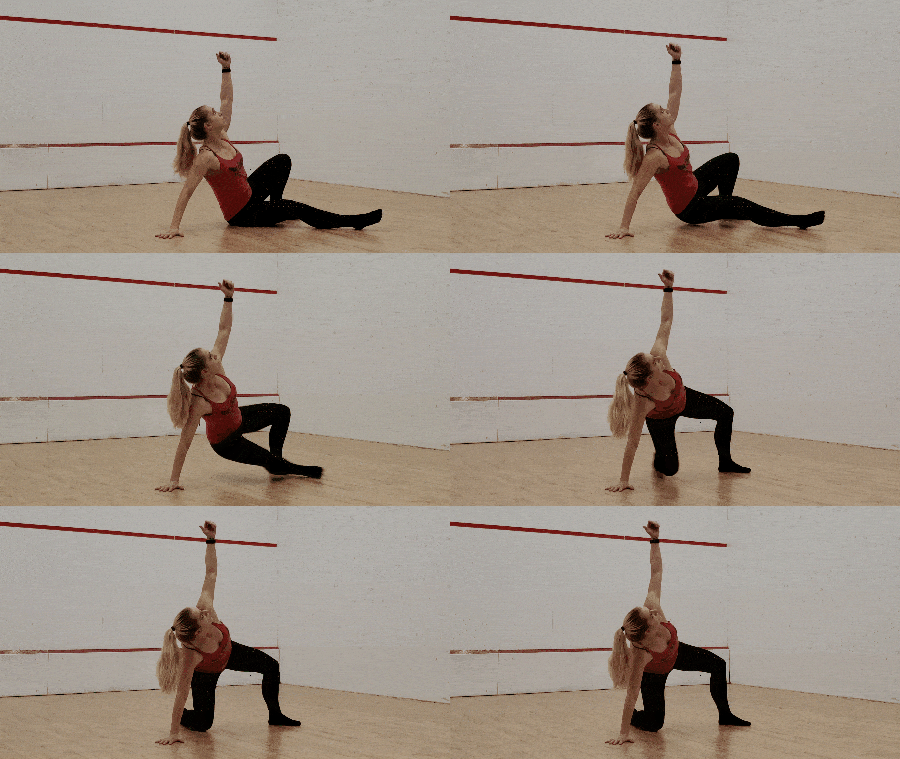
Keep your hand on the ground and lift your hips high enough to sweep your leg underneath you. We’re looking to move that leg far enough to make a triangle on the ground with your hand, knee, and foot.
#4a) Ensure a Stable Triangle
Make sure the triangle you’ve created with hand, knee, and foot feels strong before shifting weight and moving on to the next step.
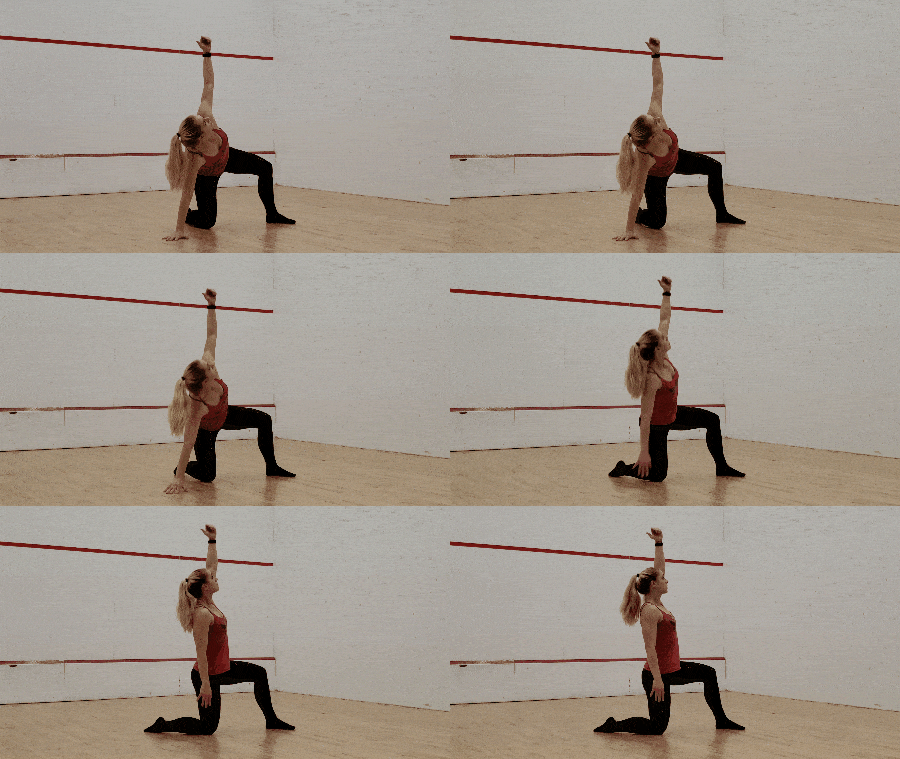
Lift up your body into a kneeling lunge, with one knee up and the other down. Take your time to maintain your balance.
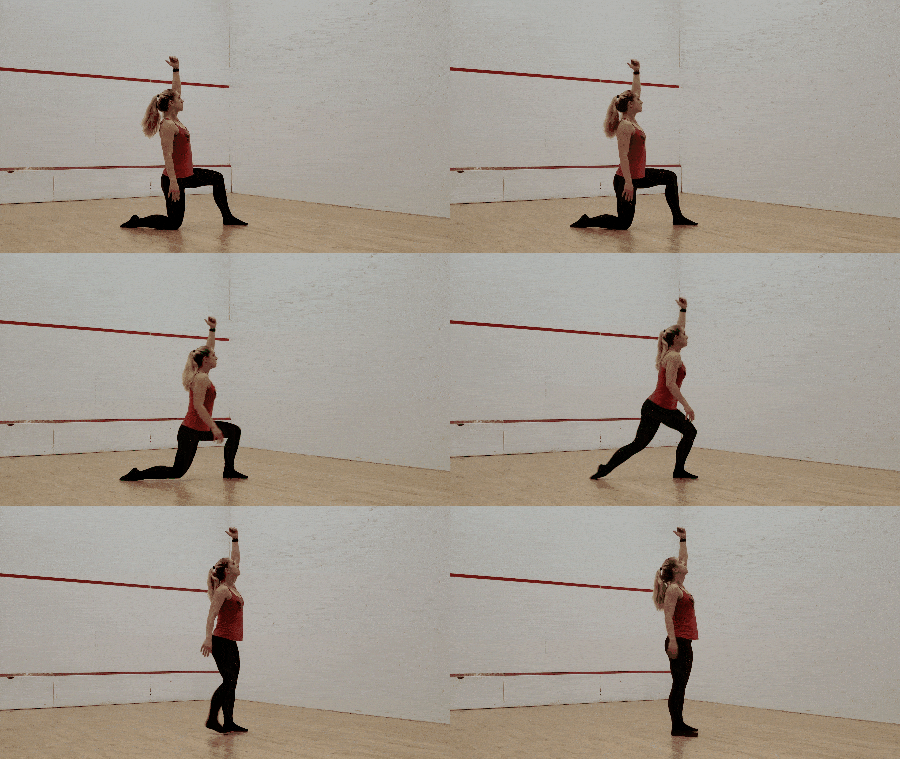
Stand up completely. This is the halfway point of the Turkish get-up.
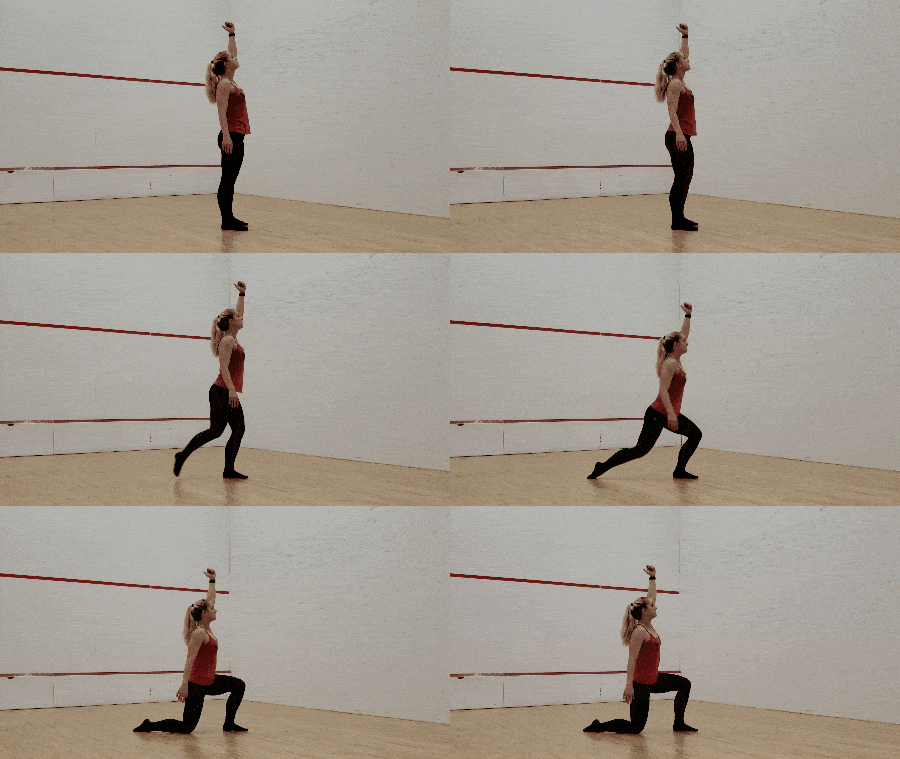
Start the descent by stepping back into a kneeling lunge.
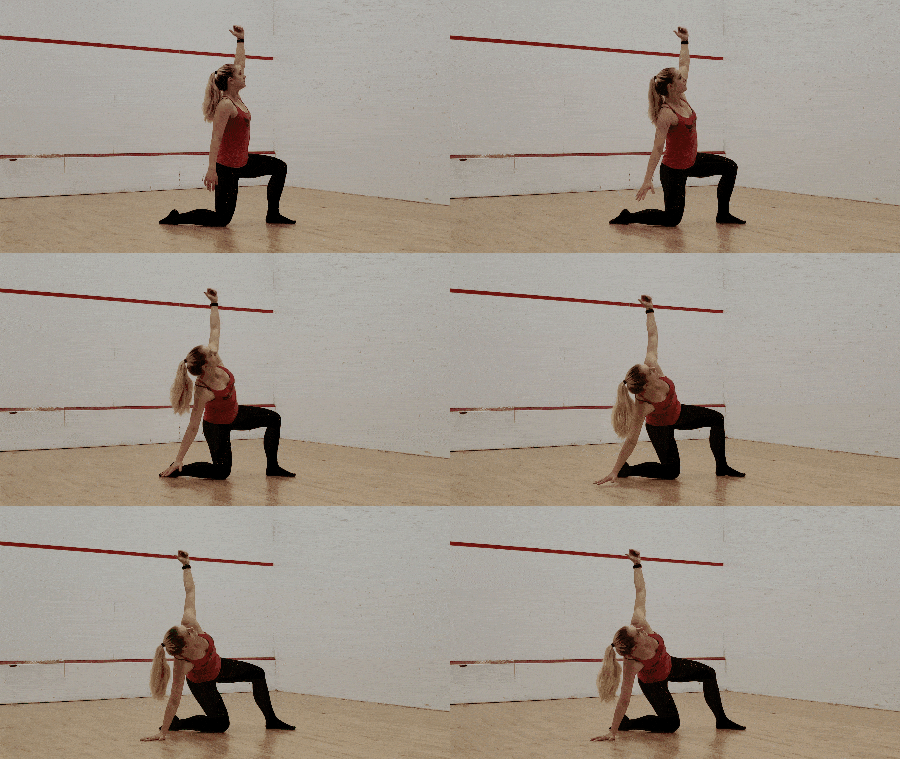
Lower your hand, forming the same stable triangle with your hand, knee, and foot on the ground.
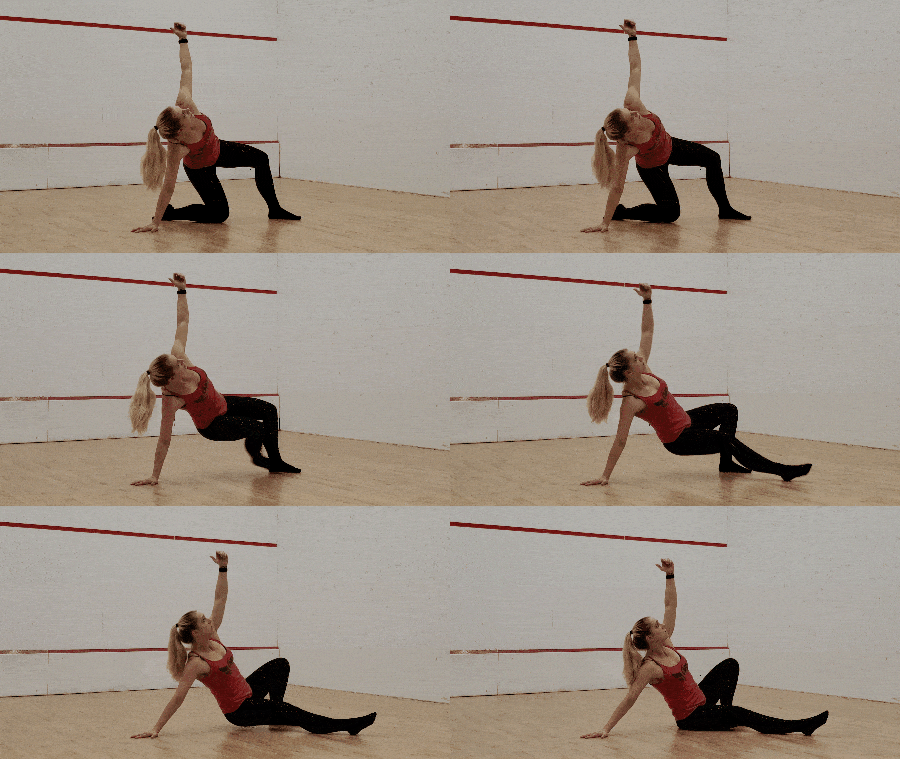
Push your hand strong into the ground and keep the hips elevated, as you sweep the leg forward and sit on the ground.
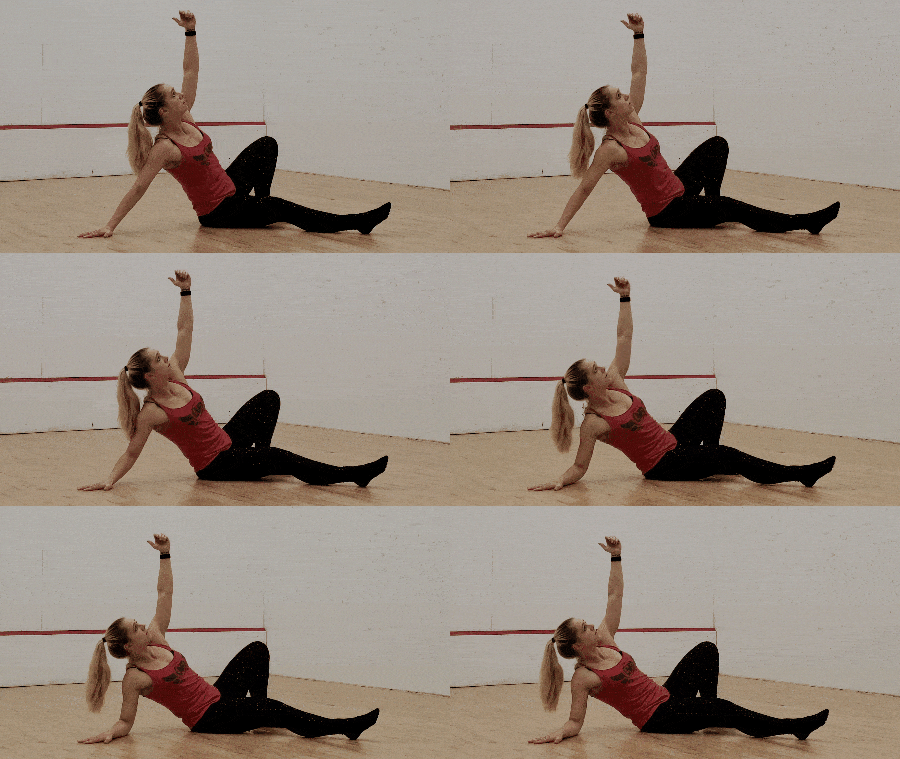
Bring your forearm and elbow down to the ground, continuing to maintain eye contact with your hand (or weight) overhead.
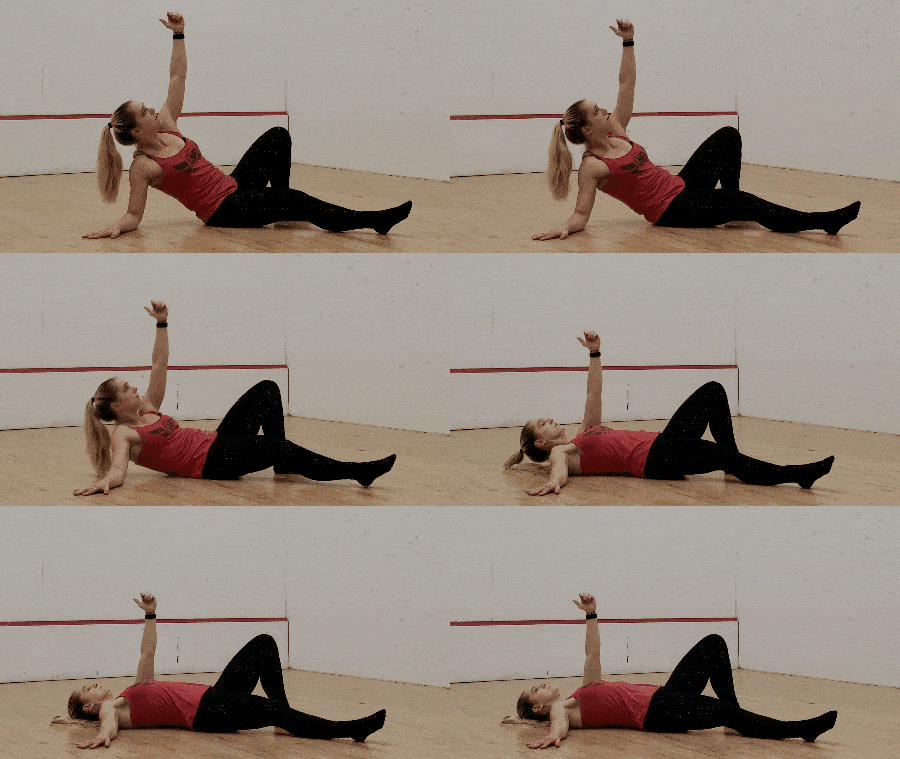
Complete the Turkish get-up by gently lowering your upper back to the ground.
#11a) If Weighted, Lower Weight Down, Roll to Your Side
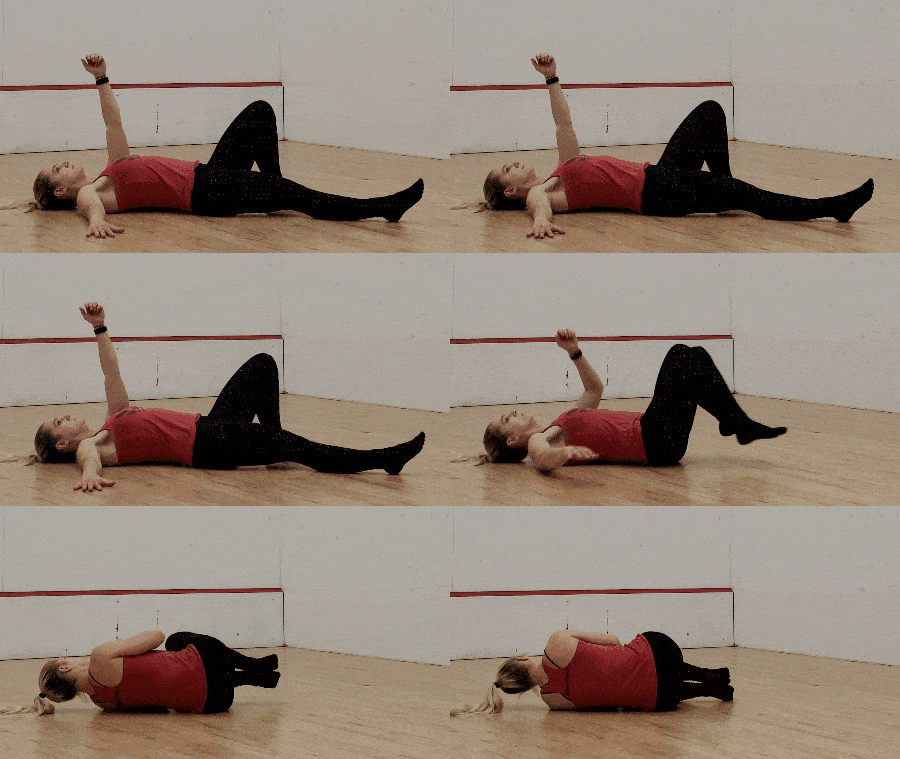
For those with added weight, lower it down with two hands (if necessary), keeping it close, and then roll it to the side to put it on the ground.

The Turkish get-up is very versatile and can be worked into your routine in several different ways.
Here are some quick examples of a Turkish get-up Workout:
Let’s break this down a bit.
If your aim is to warm up and prepare your body for action, incorporate the Turkish get-up with 1-2 easy sets. Perform 2-3 reps on each side, alternating between left and right.
This can be done with a lighter weight or just your bodyweight, focusing on proper form. Even without added weight, ensure you go through all the points of performance, treating it as if there’s resistance. Each repetition may take 15-30 seconds (or more if you’re first learning), offering a thorough warm-up. If you need a bit more warm-up, then do a few more reps! This will get your entire body ready for more activity.
While it doesn’t look like a traditional exercise, you’ll still build plenty of strength when you start increasing the weight and testing yourself.
Because of the longer time it takes to complete each rep (as opposed to something like a push-up or a squat), you’ll tend to see lower rep ranges worked with this exercise – 1 to 3 reps per side is a good place to start.
You can work the same side (all 1-3 reps done before switching) or alternate reps (one rep left, one rep right, etc). To progress, continue to increase the weight used, as long as you have control.
If you decide to add more reps, we start to enter the world of conditioning.
If we want to turn the Turkish get-up into a conditioning exercise, then increase the total number of reps, while keeping the rest between sets minimal.
Because the shoulder will fatigue first, it’s best to alternate between sides (although if you’re feeling spicy – then complete all the reps on one side first!).
We’re also looking for light to medium weight so that we can keep things going safely, while getting the heart rate up.
As with any of these recommendations, if you need to make it tougher then start adding weight and/or reps, or just decrease your rest time!

With all of these steps and cues in the Turkish get-up, you might be asking yourself:
“Why? What’s the point and benefit of learning this? What muscles are even worked?”
You might have heard of the 2012 study that linked the ability to stand up from the ground easily with a longer life. This was attributed in part to the fact that flexibility, strength, and coordination are all important things to maintain as one gets older.
But even if you’re not a senior in their golden years, you can still build up and benefit from more of each of those attributes.
In addition, and this is something very often overlooked in people’s routines, it’s good to move in different directions.
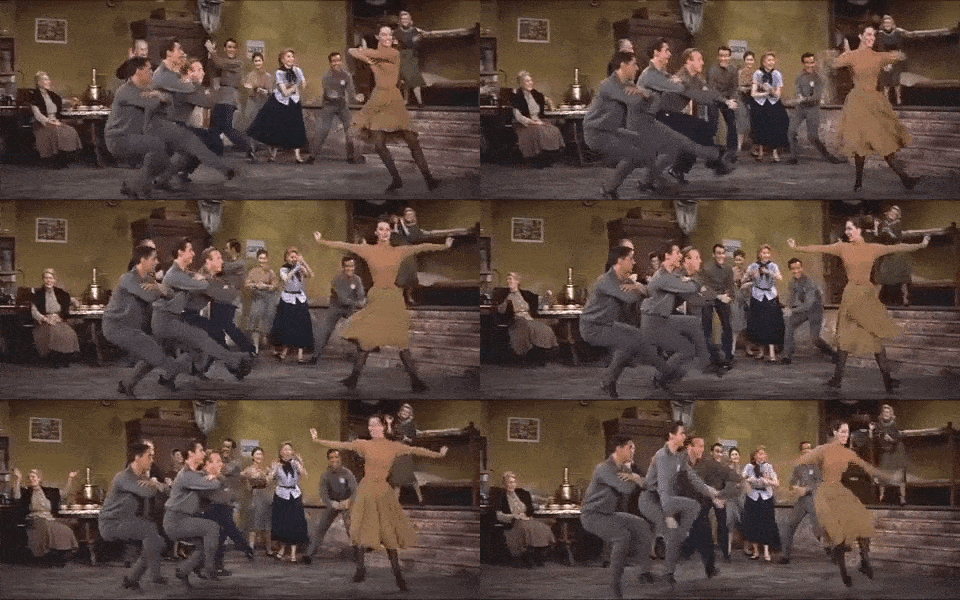
The sky’s the limit here.
Too often we head to the gym and move around like we’re on tracks: moving forward or backward, two feet together, both arms pressing or pulling at the same time.
If we never explore different planes of motion and stress the arms and legs independently of one another, then when we’re called to do this outside the gym (cue Morpheus saying “Welcome to the real world”), there can be some troubles.
Now any sort of movement is fantastic – so don’t stress out or second guess yourself – but when you’re looking to level up your workout, then look to work your arms and legs independently of each other.
This might be as simple as a lunge:
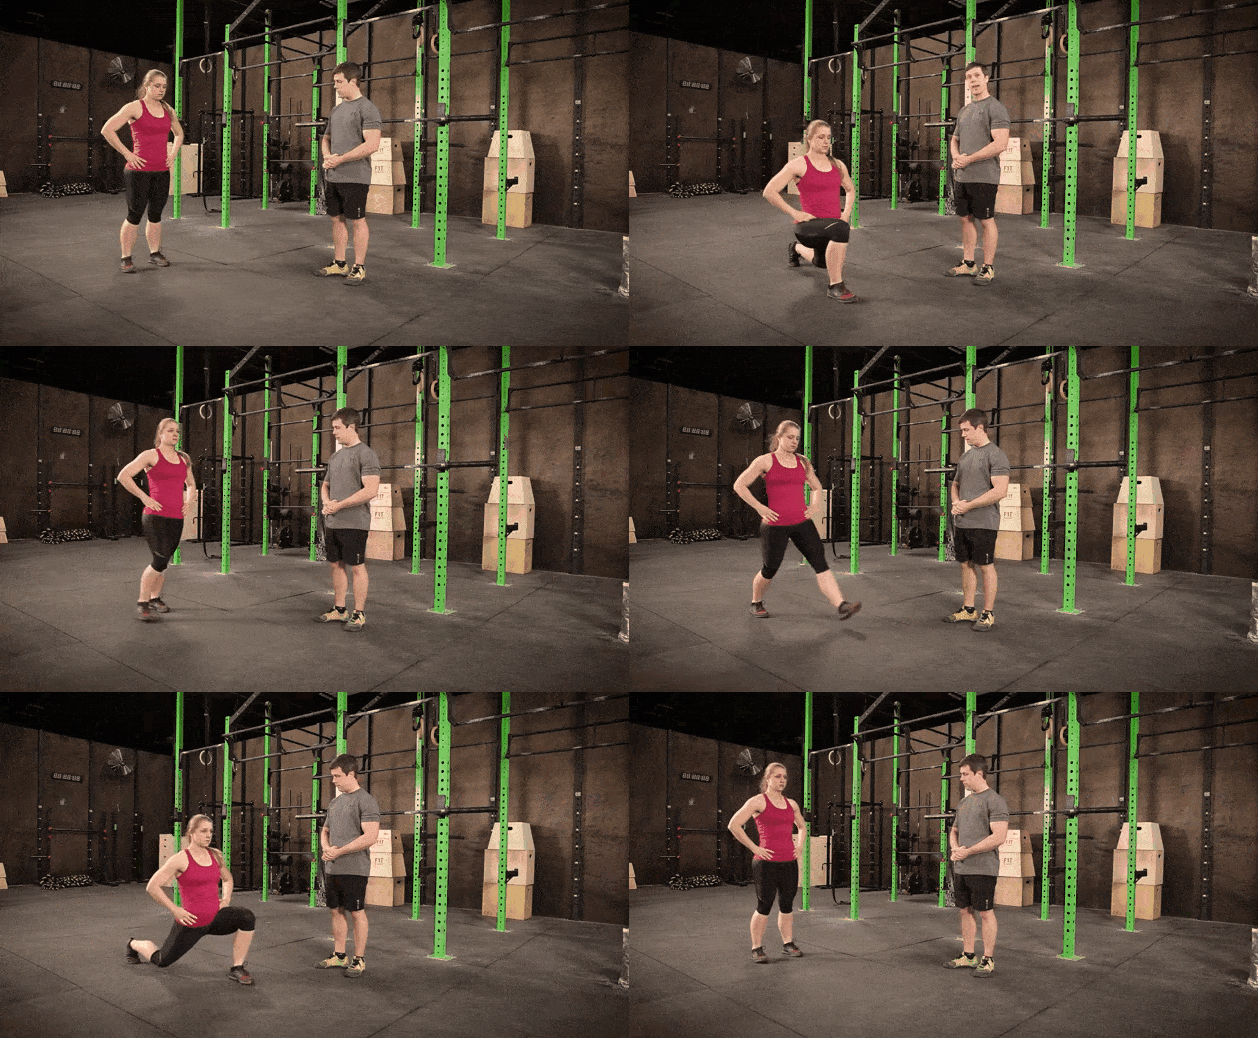
Or a one-arm row:
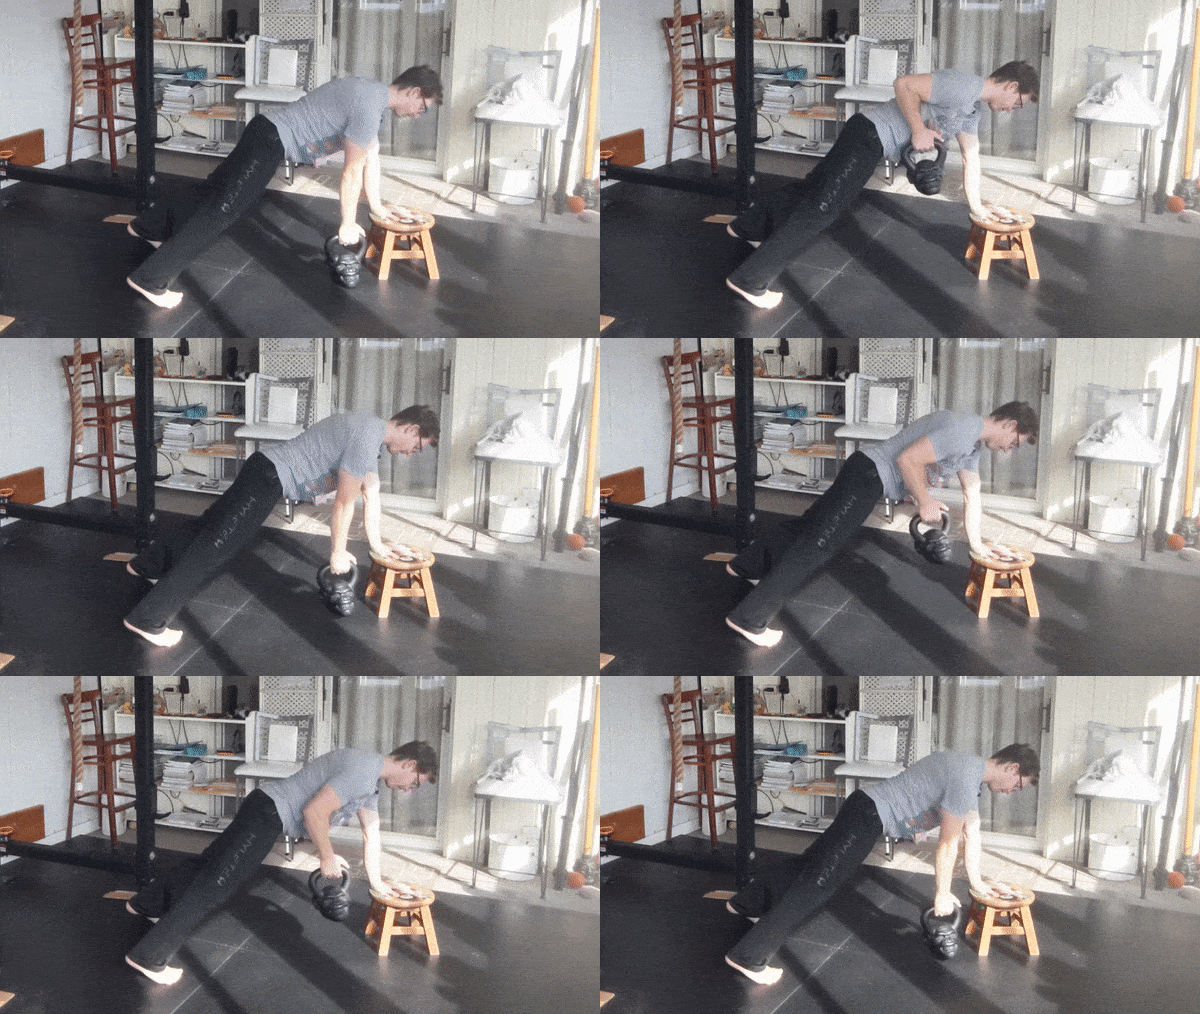
You can also look to move in different directions – this might look like a lunge to the side:
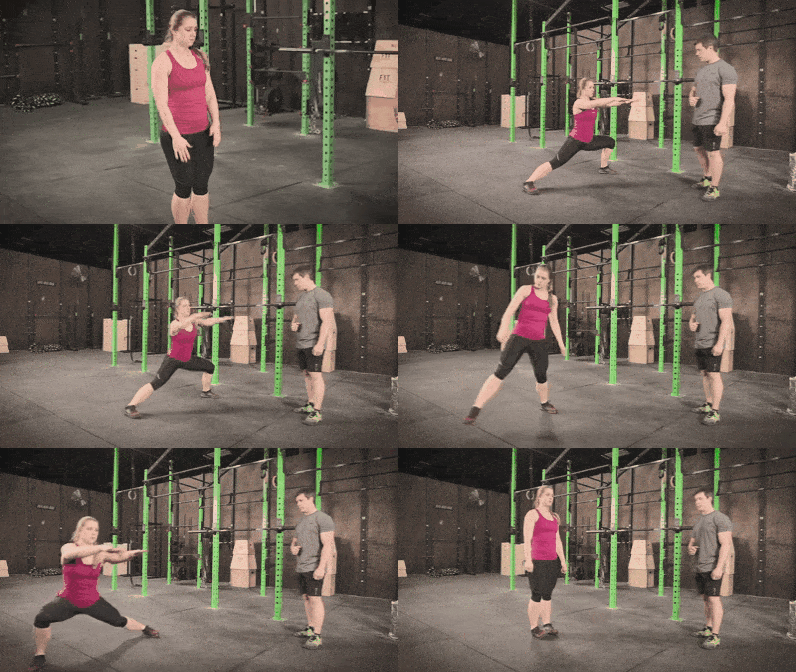
As opposed to always lunging to the front.
Then, of course, you can also pick up and explore the Turkish get-up. Feel how we’re moving in unfamiliar directions and stressing our muscles in unique ways with the exercise.
Now, to your next question:
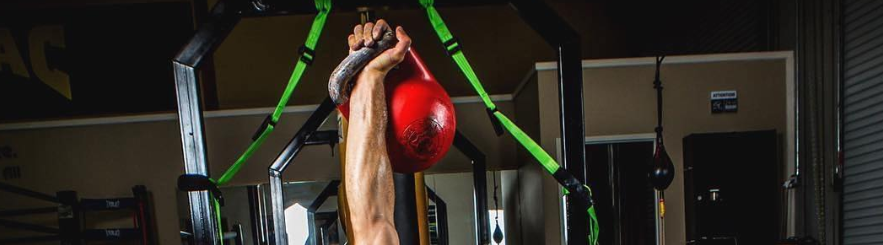
When performing Turkish get-ups, you’ll strengthen muscles like:
But really, it’s just about every muscle you have.
That’s because the Turkish get-up is what we call a “total body movement,” meaning it requires every muscle in your body, all working together.
So your shoulders will stabilize the weight above you, all while your glutes and core are engaged.
On top of that, the Turkish get-up will also help improve:
Because of this, you’ll often see the Turkish get-up included in a Functional Fitness Workout (like those found in CrossFit).
Functional Fitness means training that will carry over to your day-to-day life. With the TGU, it’ll help you remain strong to get off the floor or grab a heavy item from a shelf.
It’s no wonder people have been doing this exercise for well over 100 years (and some legends say over 200 years!).
Speaking of…
Some believe that ancient wrestlers, in what is now Turkey, invented the get-up to prepare for their intense competitions.
Additionally, it also demonstrated their immense strength to each other (everyone loves to show off now and then).
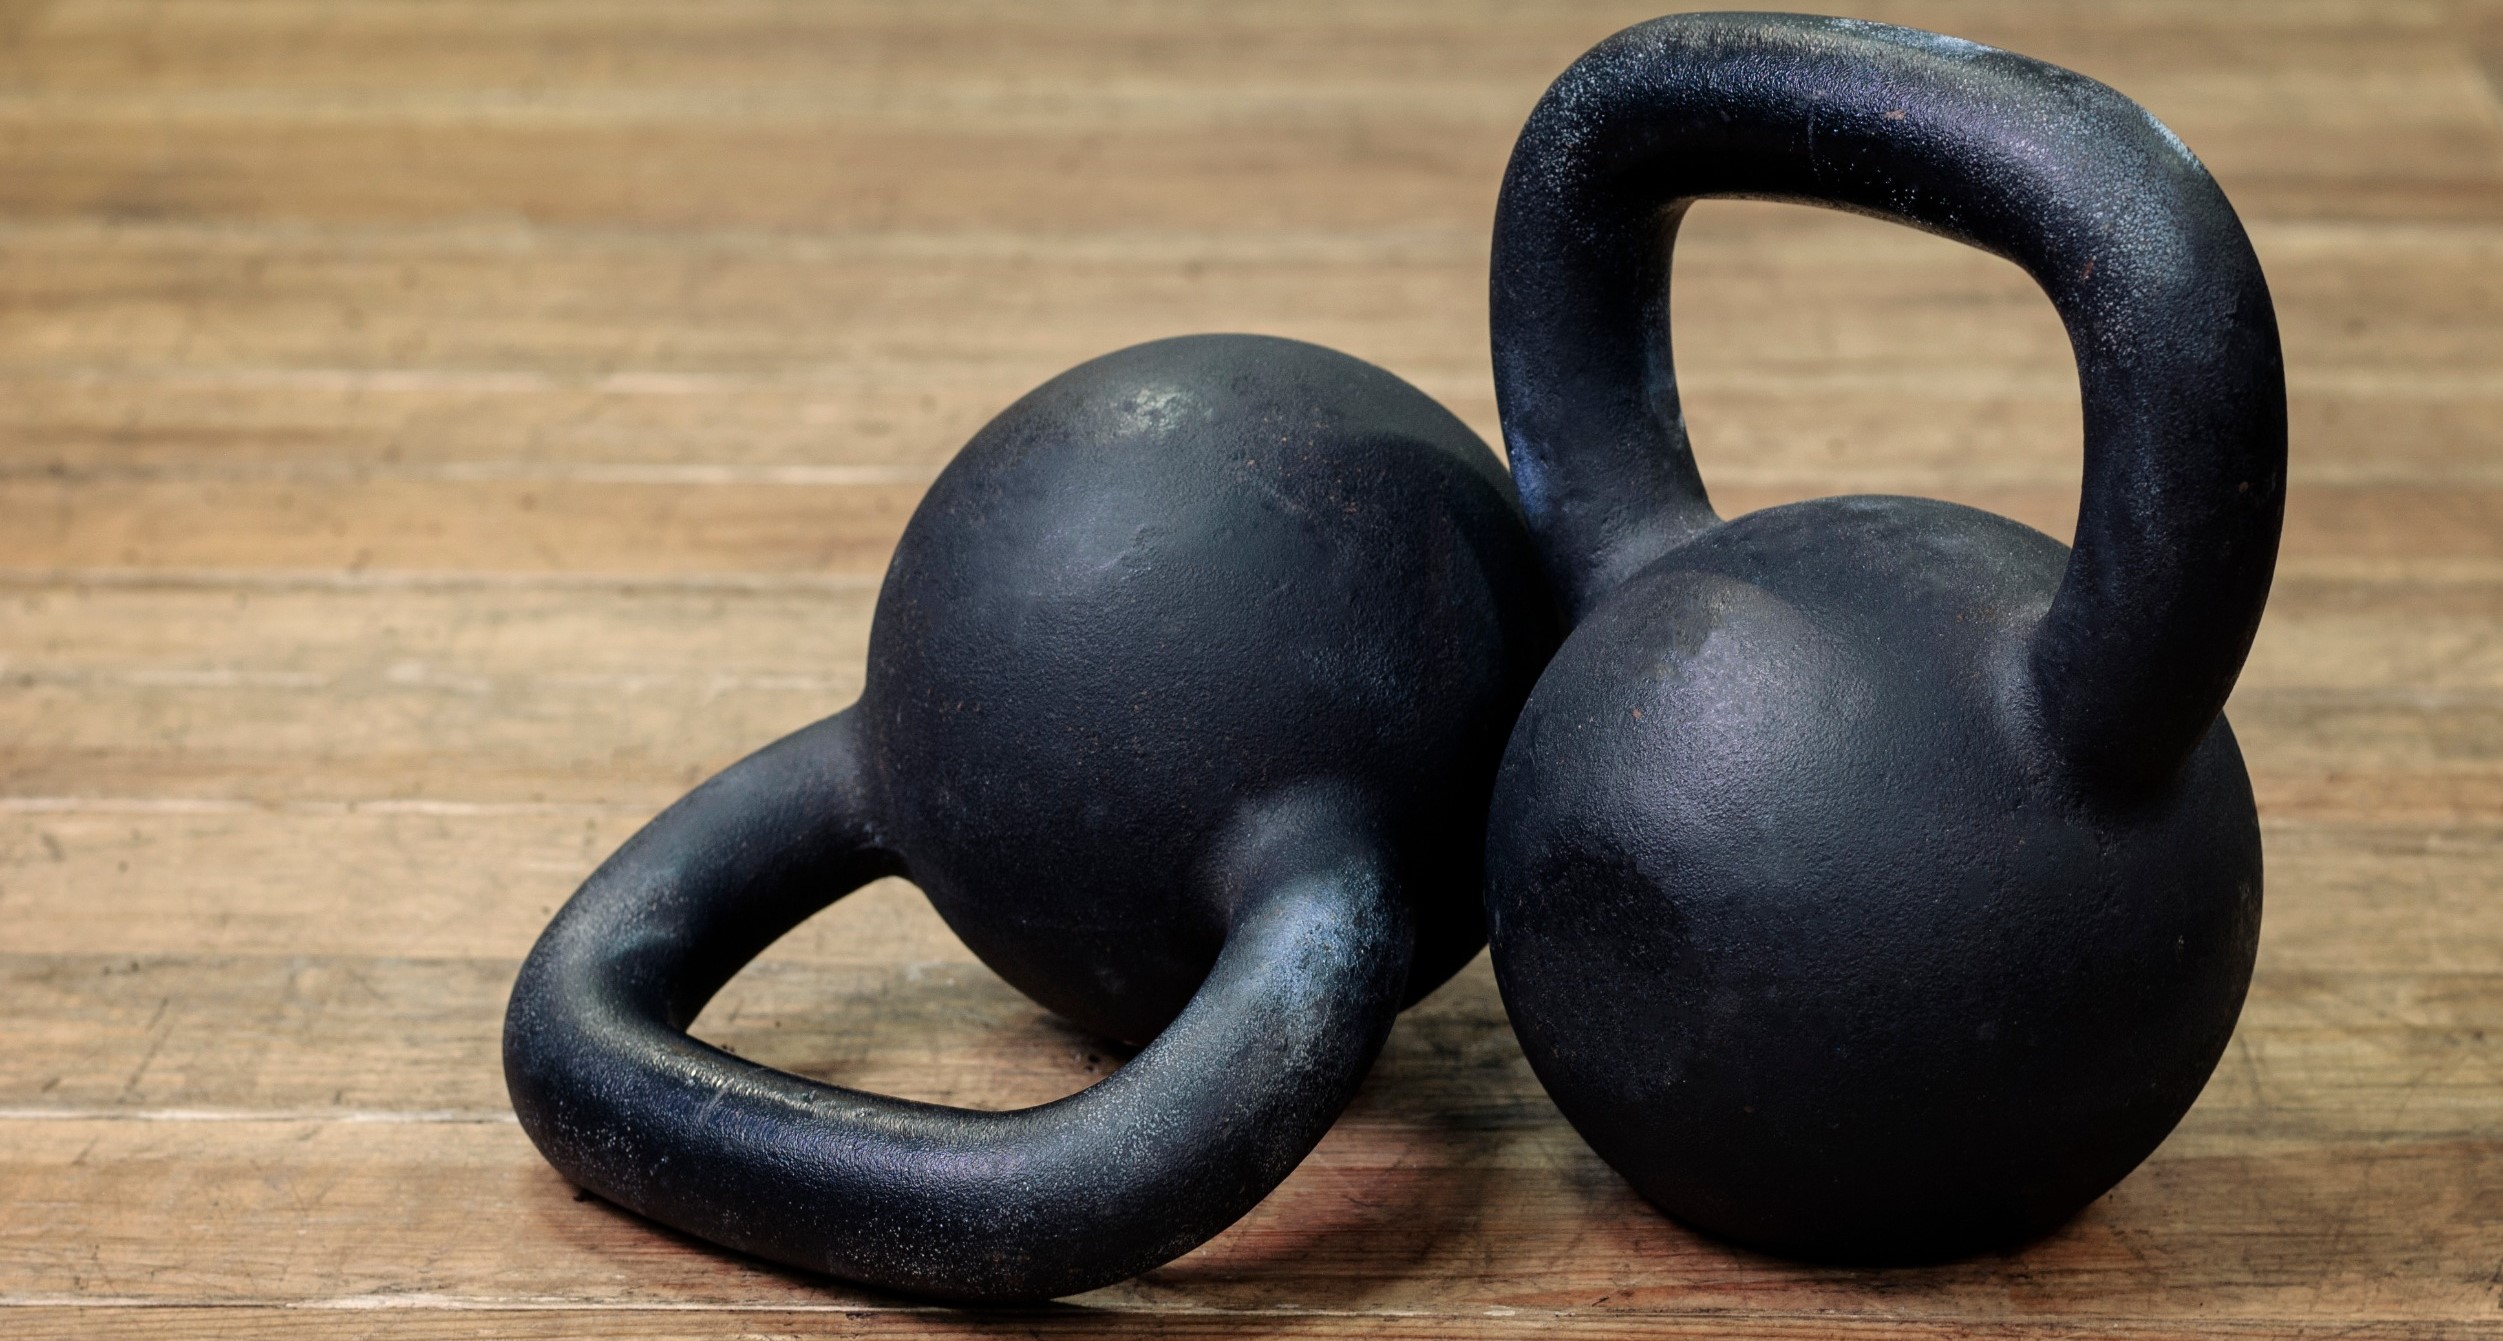
To support this theory, it’s also worth noting that the Turkish get-up is traditionally done with kettlebells, which have historical use in the region.
For example, as BJJEE points out, you can find old kettlebells at the Taksim Pera Museum in Istanbul, Turkey:
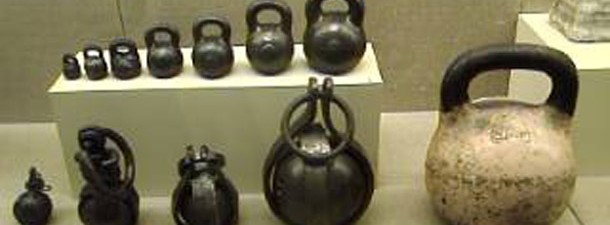
So that’s probably why it’s called the “Turkish get-up.”
You might also hear the TGU referred to as “The Turkish Stand-up” or “The Kettlebell Stand-up.” Don’t worry, it’s all the same exercise.
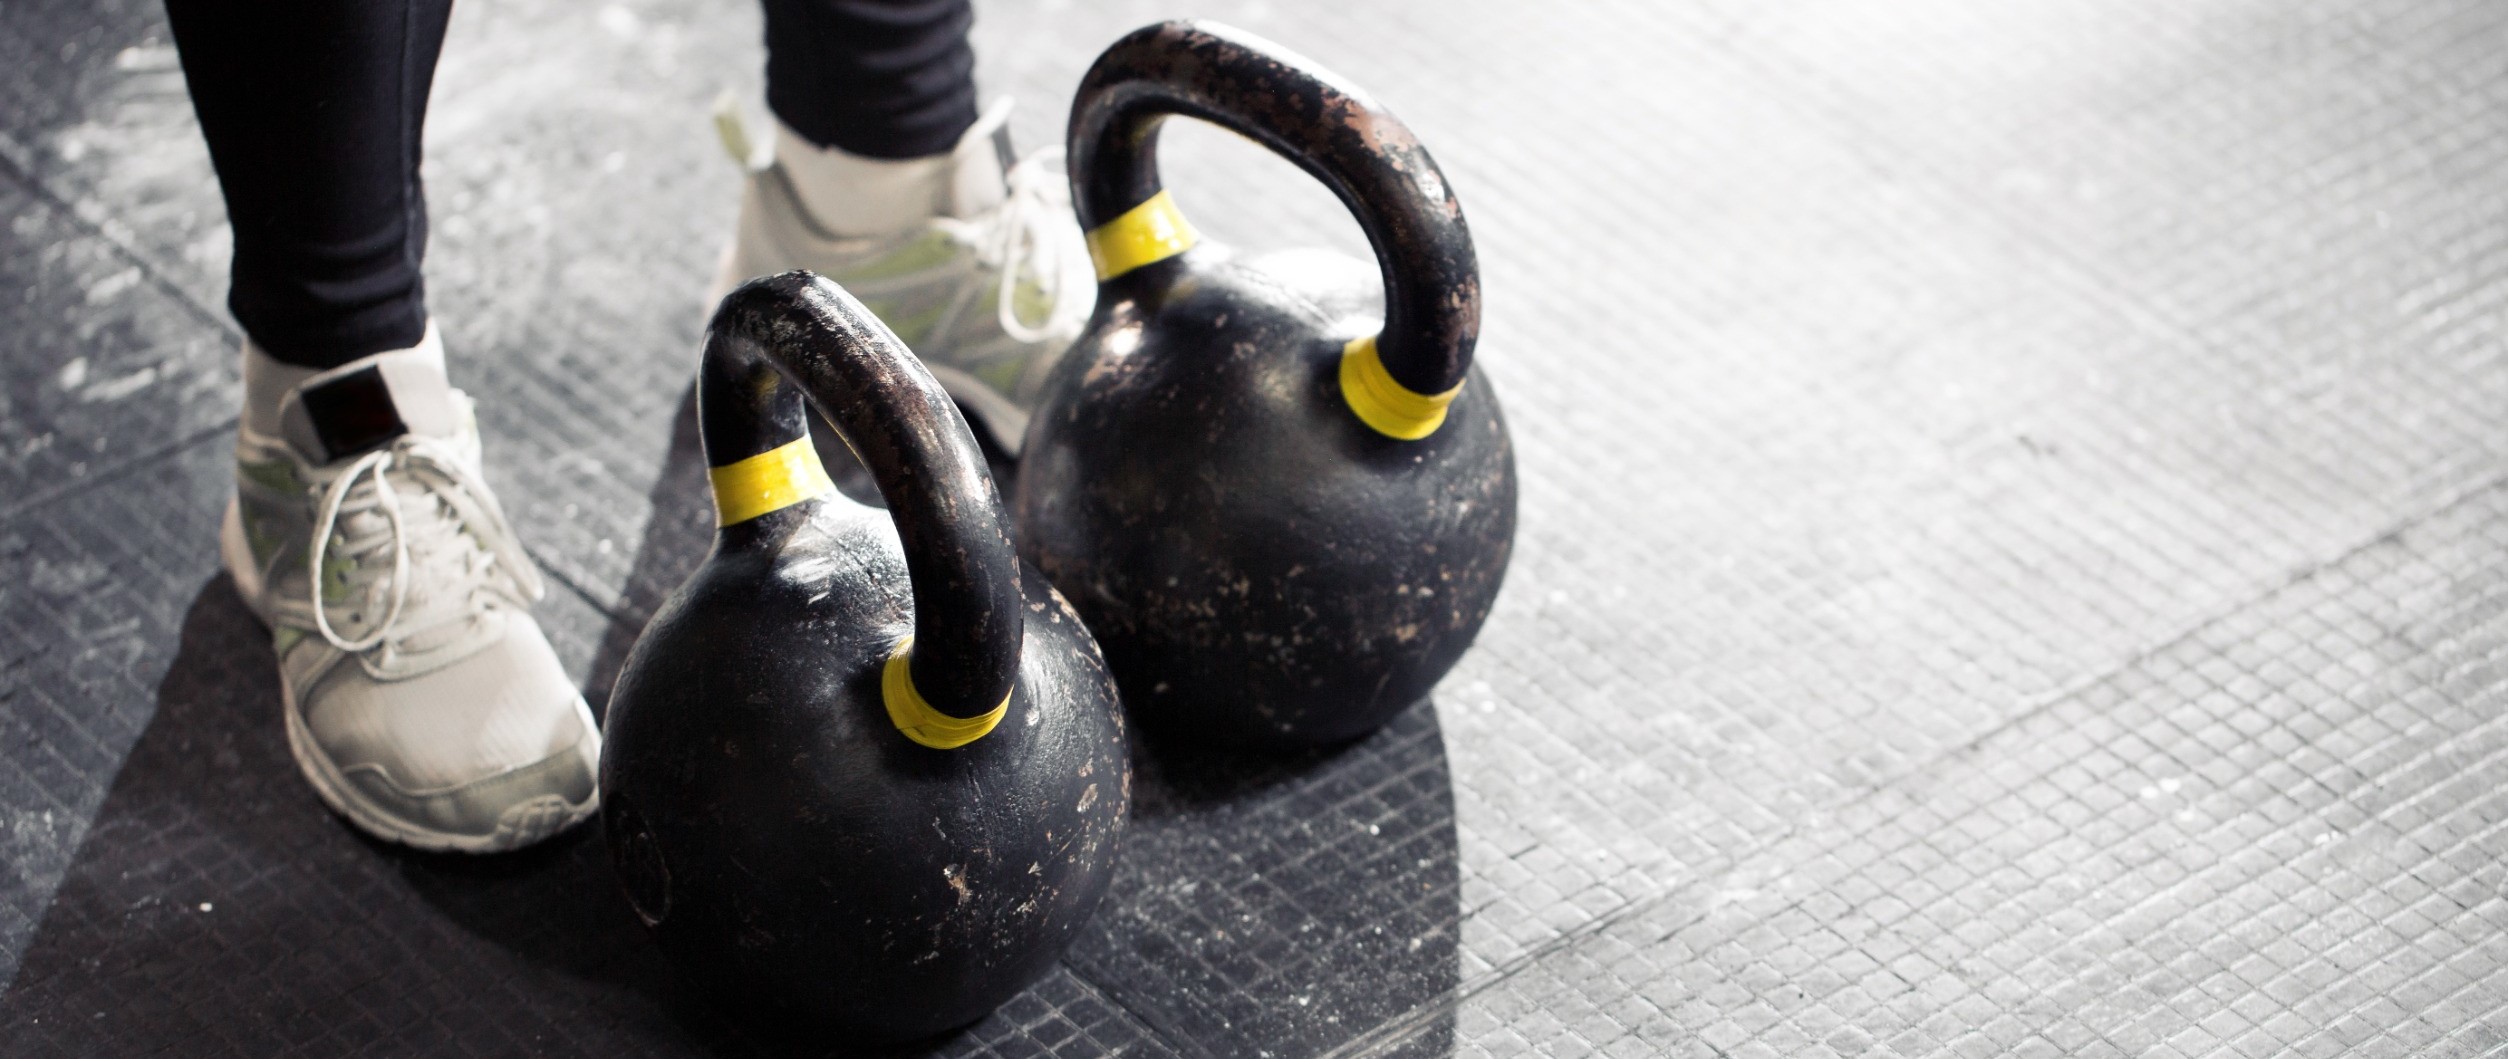
Even as we tout all these benefits, we also understand that the Turkish get-up is an intimidating exercise!
After all:
Never fear! There are a lot of things that a beginner can do to tackle the TGU, build confidence, and have fun with it.
Here are four ways a beginner can get started with the TGU:
As we mentioned earlier, a good starting point would be to work the movement with nothing but your own bodyweight.
There’s enough to think about with your own coordination, before having to worry about controlling another object too!
Another really good way to ease into the full TGU is to work on parts of it. You can do this anywhere along the line for as many steps as you want, but some of my favorite variations:
Part #1) From the start (lying on the floor), to getting up to your hand, and then back down again.
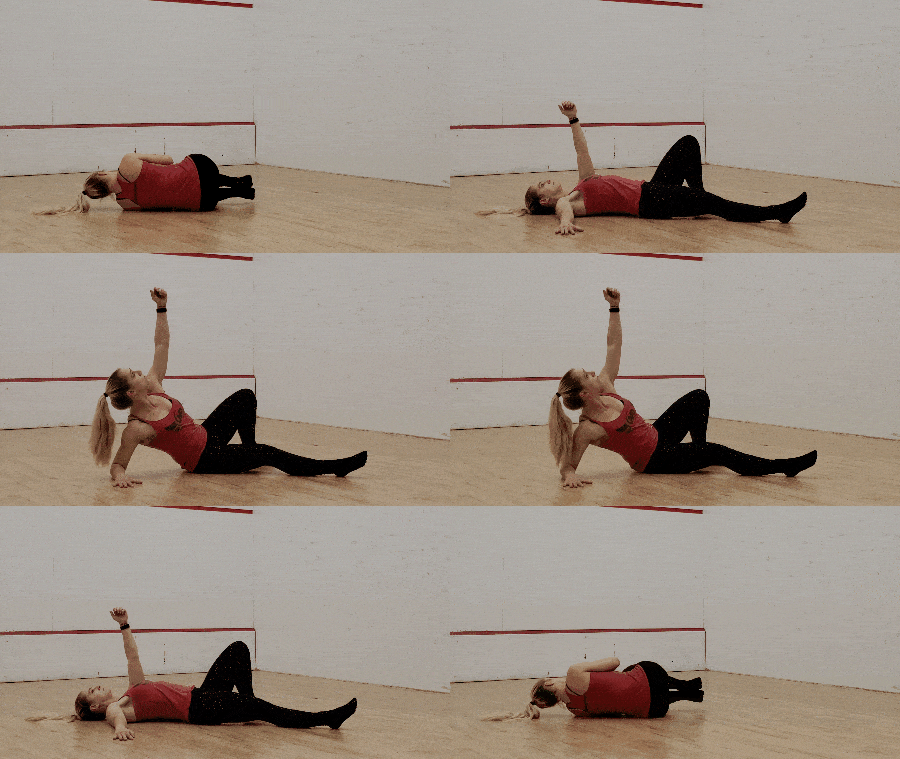
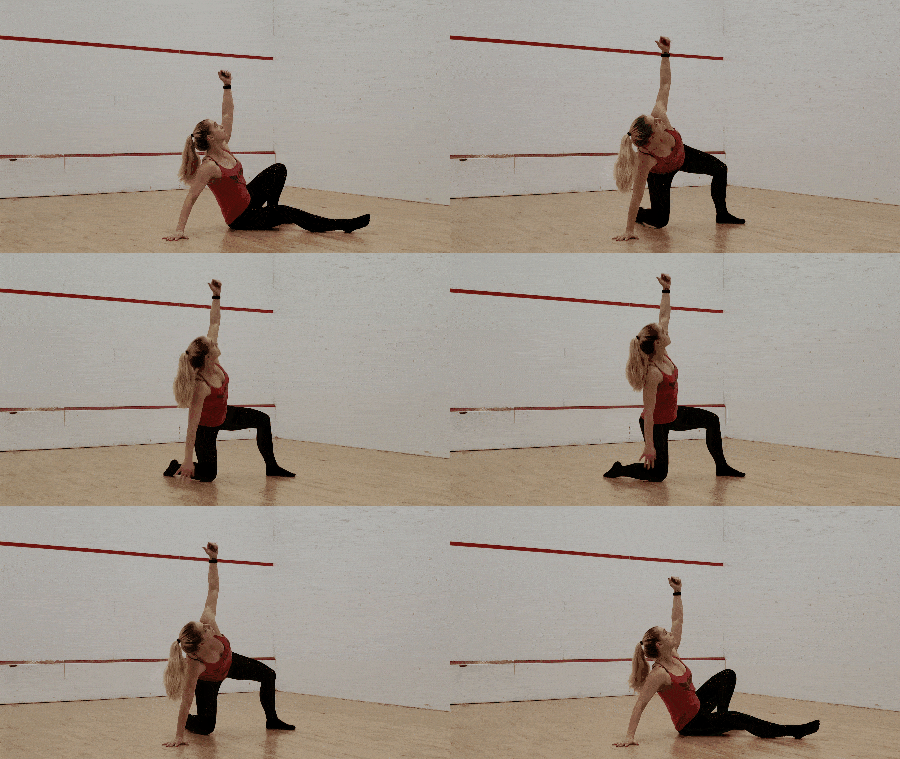
Part #2) From sitting up on your hand, to bridging your hips up and sweeping the leg under, and then reversing it.
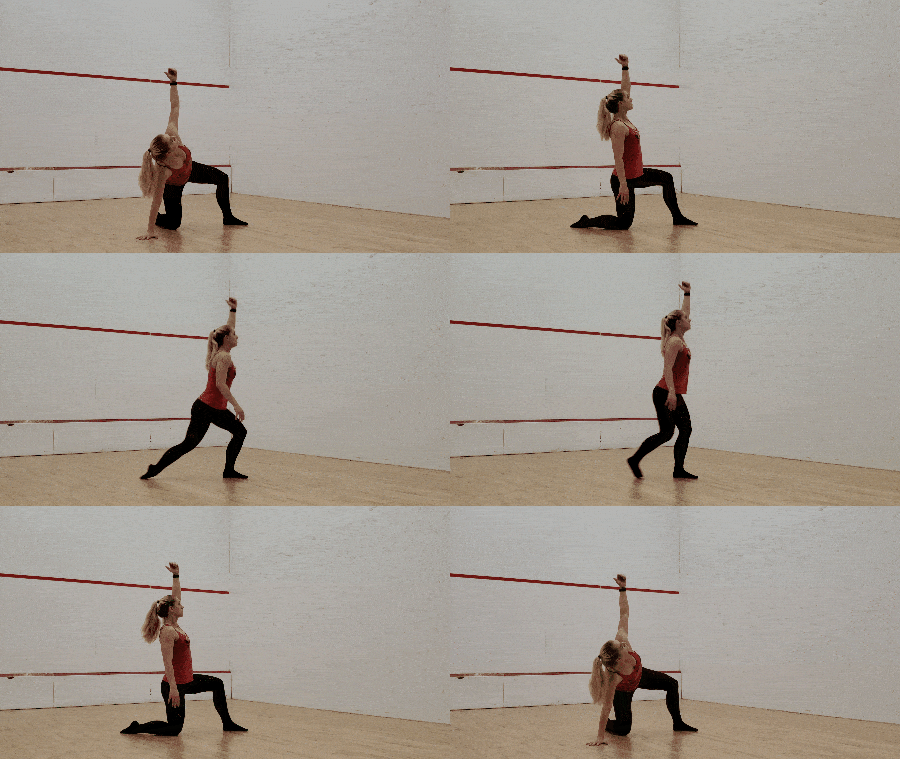
Part #3) From foot, knee, and hand on the ground, to getting into a reverse lunge position, then standing up, then reversing it all (reverse lunge back down, put your hand down in the triangle)
As Coach Staci showed in the video at the top of this article, a fun variation you can try before adding any weights is standing up and down with a shoe in your hand!
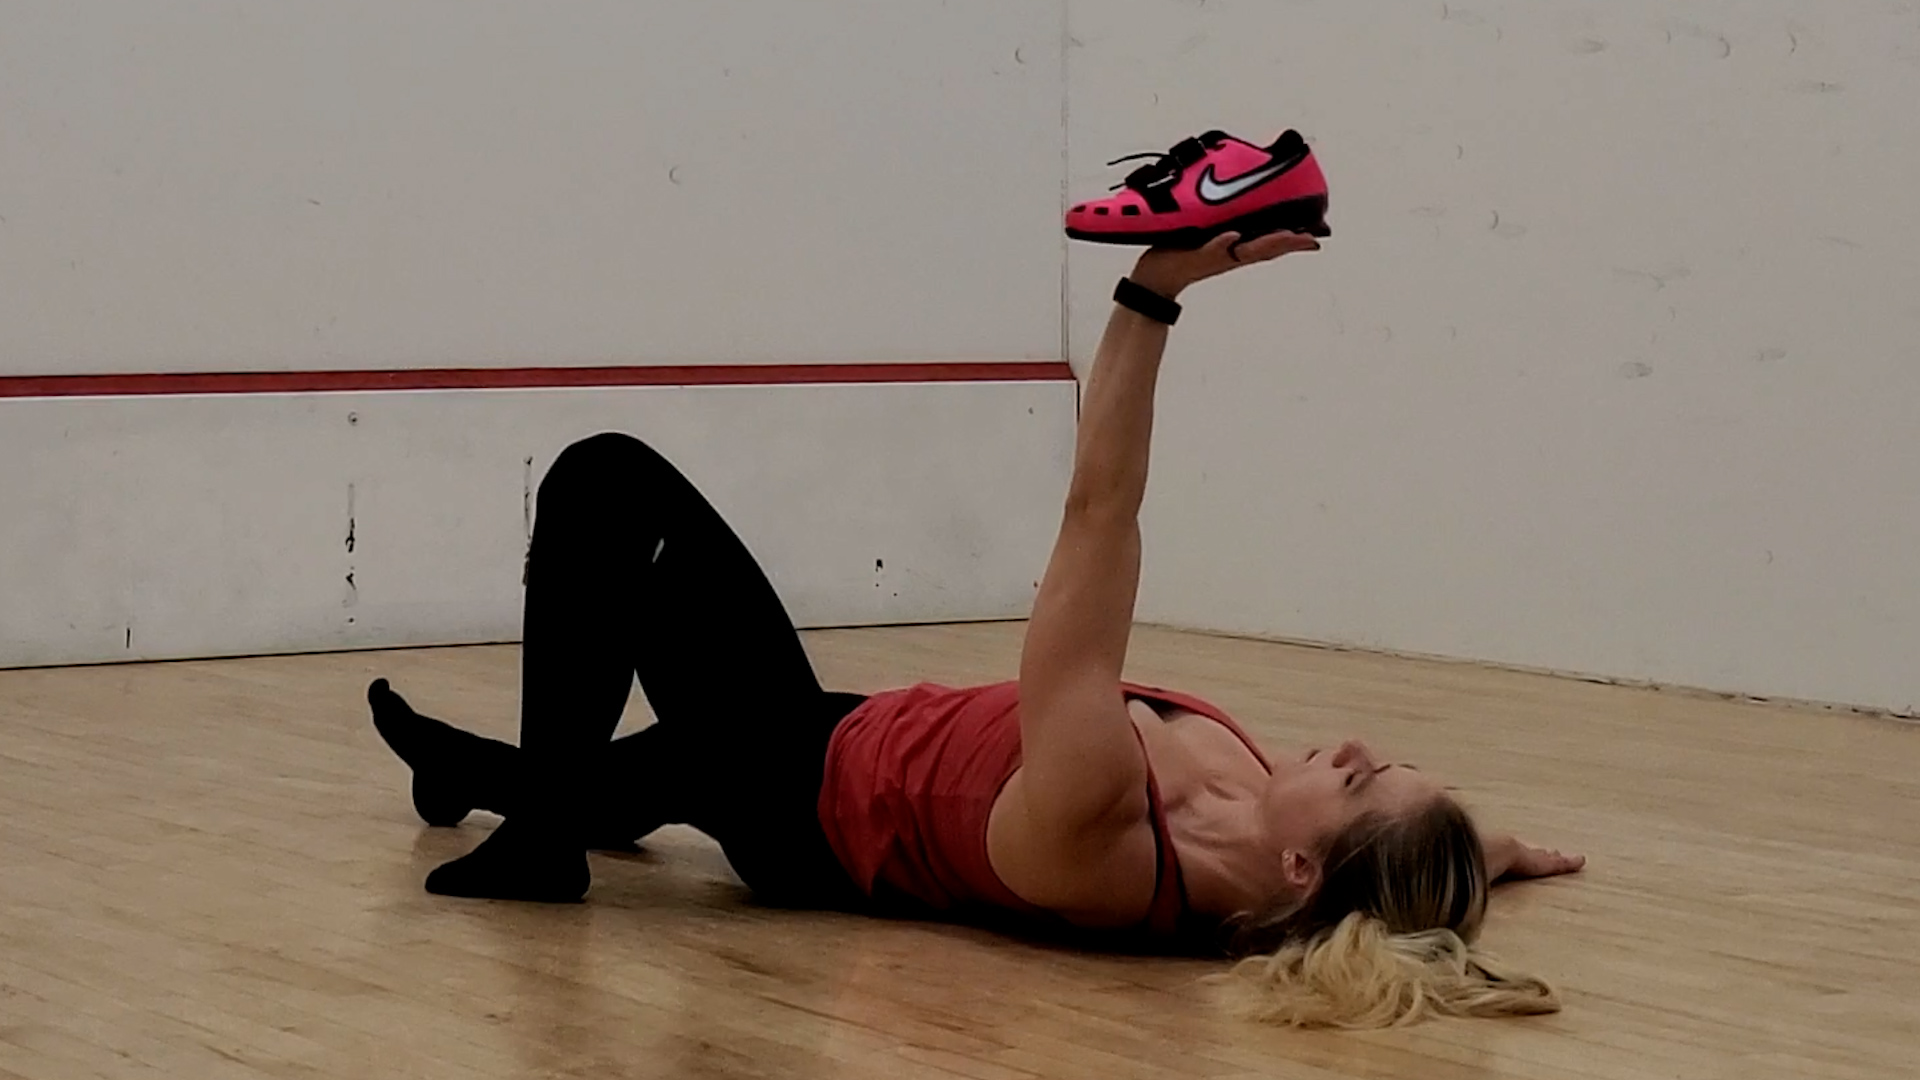
Specifically, we want to rest the shoe on our open hand, so that if you let your arm drop or drift forward, the shoe might topple out.
If you want a more “fun” variation of that, you can do a TGU with a medicine ball in your hand. Pick a larger one so that you can’t grab and control the ball (unless you have hands like the Hulk!). This will really test your abilities to keep the arm vertical and control every aspect of the motion.
And if you think this is too mean-spirited, just know that in many kettlebell certification courses, they expect you to do this open-handed with a cup of water! Any wavering from a good position will result in an impromptu shower!
It’s all in good fun though, and will give you a really, really good idea of what steps you need to practice more.
Despite the detailed steps, there are a few prevalent mistakes that often crop up. Let’s talk about what we SHOULD do to avoid them.
#1) Keep Your Eye on the Weight!
This is so key that you should write it on the bottom of all your kettlebells. It can be tempting to look around as you play one-person twister with yourself, but keep watching that weight! It is much, much easier to control it when you do. If you do have to bail and drop the weight to the ground, it’s also easier to direct if you’ve been watching it the entire time.
#2) Use Two Arms to Bring the Weight into the Starting Position.
Early on, it’s common to grab the weight with one hand, especially with lighter loads. However, as weights get heavier, this becomes impractical and risks shoulder strain. Practice rolling to your side and using both hands to secure the weight, ensuring a controlled and safe setup.
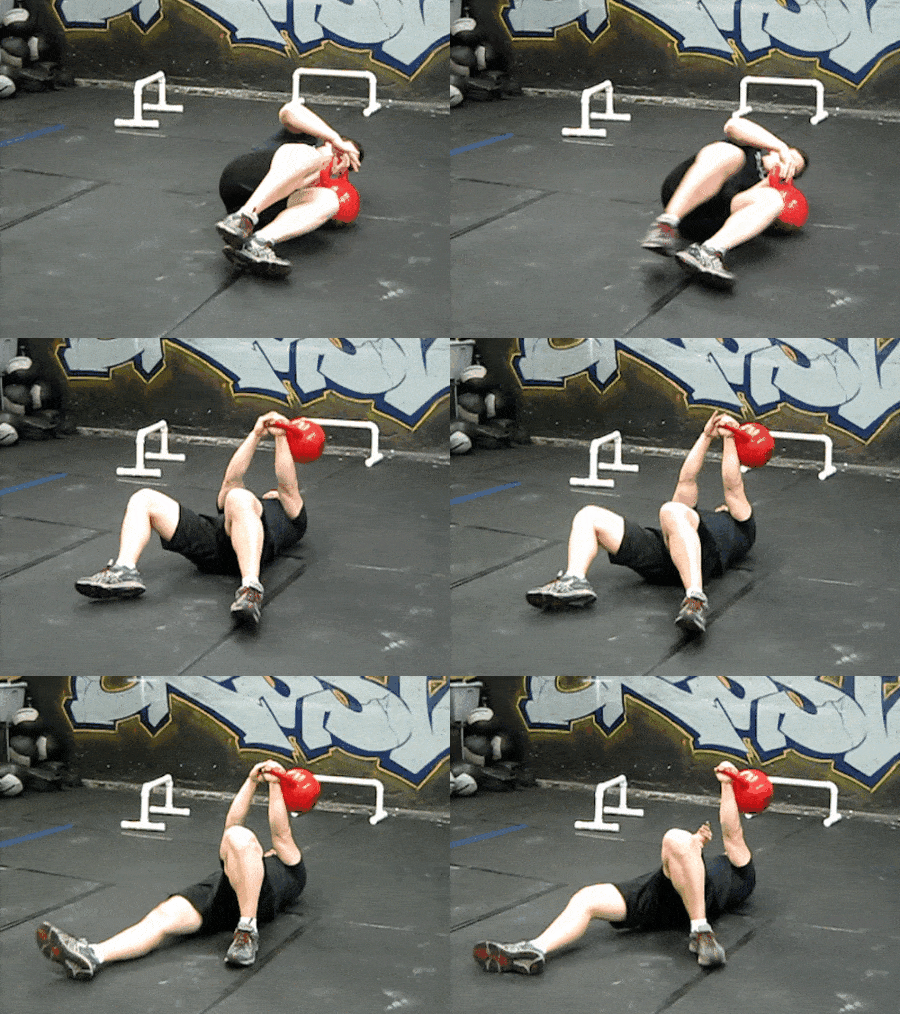
#3) Try to ROLL SIDEWAYS to Your Forearm and Hand.
As we’re lying on our back with the weight over our chest, it’s incredibly common for people to want to sit forward and up to get into position. Maybe it’s years and years of sit-ups in gym class. While you can get away with this with light or no weight, it quickly becomes impossible with heavier weights.
Instead, think about rolling to your side (the side opposite the weight) to get onto your forearm and then hand. You should press down with the leg that’s bent (the leg that’s the same side as the weight) to help the movement.
#4) Create That Triangle Before Moving Up into the Reverse Lunge.
After we bridge our hips and sweep the leg underneath, it can be tempting to try and rush the next step and try to get upright and stand up. As with all these steps and mistakes, you’ll be able to get away with this with lighter weight, but not heavy.
After you sweep your leg under, pause. Ensure you’re forming a stable triangle with your hand, knee, and foot. This foundational position provides the stability needed as you ascend.
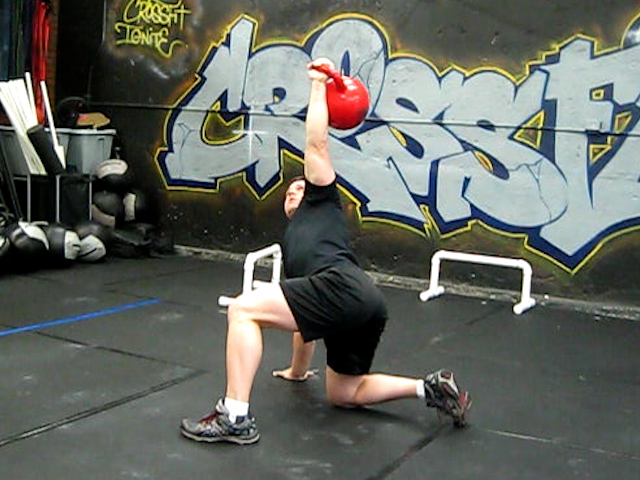
#5) Press the Weight Up and Back as You Stand Up.
This is a cue that might not make sense until you try it and feel it, but the common mistake we’re trying to correct here is when people stand up from the lunge position, and their arm (and weight) shift forward. This often then results in them losing the weight to the front and dropping it.
To counteract this, focus on driving the weight up to the ceiling and back behind your head. This intention will help keep the weight over your own center of gravity so you can stand up triumphantly.
#6) On the Way Down, Roll to Your Elbow, Then the Nearest Shoulder, Then the Farthest Shoulder.
Another cue that may sound puzzling until you’re finishing up a TGU with heavy weight. Common mistake here is to get excited and rush the end. Your hand is on the ground, your hips are on the ground – things are so close you can taste it!
Well, you might be tasting the weight in a moment if you simply fall backwards to your entire upper back. Just as we want to focus on rolling upwards at the start (as opposed to trying to sit forward and up), we want to do the same thing on the way down.
Get down to the elbow, keep the upper body slightly rotated as you lower down to touch one shoulder, THEN let the rest of your upper back and second shoulder roll down and rest on the ground.
Plus, don’t forget…
#7) Engage Your Core Throughout the Turkish get-up.
Given the technical nature of this exercise, it’s easy to let your core relax. Actively engage your core throughout the entire movement to ensure stability and control.
#8) Move Slow.
Resist the temptation to rush through the Turkish get-up; it’s a recipe for injury. Move deliberately and in control throughout the entire sequence. If necessary, opt for a lighter weight—there’s no shame in prioritizing safety.
If you’ve made it this far, then you’re obviously pretty serious about growing strong.
So why not check out our Beginner’s Guide to Strength Training?
It’ll show you exactly how to:
Yep, it’s pretty cool, and many a nerd have used it to start their strength training careers.
Okay, I think that about does it for me.
I’ll see ya later!
-Coach Jim
PS – You may be asking yourself:
How much progress can you make with the Turkish get-up?
Well, they make really heavy kettlebells, so there’s practically no limit here.
For example, here’s me doing a TGU with 106 pounds:
Just move up in bells gradually and consistently, and you’ll be lifting heavy weights before you know it.
###
Photo source: ruttanapol/123RF.COM, karmiic/123RF.COM, ©rosinka79/123RF.COM, Turkish Get Up, malkovkosta/123RF.COM, tonobalaguer/123RF.COM, sergign/123RF.COM
Workouts, nutrition guidance, and habit-building. Never wonder where you should put your limited time, energy, and effort.
Get our FREE Starter Kit with dozens of resources today!