Welcome to the Nerd Fitness Flexibility Benchmark Challenge!
We’ve created this challenge to give you a clear, measurable starting point for a variety of common stretches. This will serve as your baseline to show progress as you embark on your journey to become a more fit and flexible nerd!
We’re firm believers of the mentality, “what gets measured gets improved,” and we know the power of having pictures and exact measurements from day 1 so you can look back and see how far you’ve come. We suggest you use this tracking sheet to record the 10 benchmarks once a month for the next 4 months.
If you’d prefer to track over a longer period of time, try measuring every two months or three months! Keep in mind that progress and change take time, so we’d caution against testing more than once a month.
YOU CAN DOWNLOAD YOUR TRACKING SHEET HERE
Print out this sheet and tape it up somewhere you’ll remember, or save it to your computer and edit it as you go – whatever works for you. Over the next 5 days, we will be sending you details about how to complete these benchmarks.
You will receive information about two measurements per day, with full written instructions and video about how to complete them.
We understand that you may be excited and want to jump ahead and do everything immediately, but we encourage you to take it slowly and follow our lead. This will help slowly ease you into a daily stretching habit that will actually stick!
If you want to do all of the benchmarks at once, we will be sending out a download on day 6 (the day after we send the last two benchmarks) that includes every single pose with all instructions. That way, if you can only get a friend to help for one day, you can do it all at once.
Last few things before we get started (IMPORTANT):
- These are benchmark tests, not a workout or stretching plan. A regular practice like yoga or active stretching that is focused on improving flexibility will create more long term results. We will include a few yoga poses that you can focus on if you’re struggling with a specific benchmark.
- Many of the stretches are far easier to record with a friend helping. If you have no options to get a helper, still try your best to record accurately. If you can, have a friend take a photo; sometimes, small increases in measurements can reflect much more clearly in before and after photos. If you’re on your own, one great tip is to record yourself doing the stretch using the camera on your phone (Pro tip: I use my shoe as a tripod!), and then screenshot the video to get a picture.
- This isn’t a competition, this is a benchmark to show personal improvement in several areas over time. Remember: that which gets measured gets improved. Be honest with yourself!
- Breathe slowly and steadily, and stretch slowly. Jamming your arms forward to stretch an extra inch for a fraction of a second doesn’t count. Stretch slowly until you cannot stretch further, breathe, and take the measurement there.
- If you need to measure a different way because it’s easier for you, that’s fine, as long as you consistently use the same method every time.
- You don’t need to do a full workout before, but it’s good to do something light (a 5 minute walk, a few squats, jumping jacks, or knee pushups) just to get your blood flowing and your body into motion before recording your benchmarks. Keep it light, but move a little before jumping in.
- If it hurts or doesn’t feel right, stop! Stay safe. Don’t push your body into places where it isn’t comfortable. That’s not the point here! Get a safe, comfortable starting measurement, especially on any of the following movements you don’t do on a regular basis. Stretch slow, move slow, and use a friend to help if at all possible.
- The lawyers made us say it: please make sure that before you start any exercise or fitness program you check with your doctor!
Now, onto the first two benchmarks!
Benchmark #1: V Sit and Reach
- We recommend to set up for this you put a piece of masking tape on the floor to create a line from one heel to the other heel – in between the soles of your feet, though you can use anything (a string, yardstick, etc).
- Sit on the ground with your legs extended out in front of you. Your feet should be about two feet apart (60 cm).
- Put one hand on top of the other hand (it does not matter which one is on top). Make sure they are even (don’t let one hand jet out in front of the other).
- Keep your legs straight and flex your feet so that your toes pointed straight up. Also be sure to keep your knees straight, but not locked out or hyperextended – there is no need to jam them into the floor here!
- Reach forward and bring your fingers to the ground and reach as far as you can comfortably hold. Reach a few times to get a good feel and hold your fingers down and still for a few seconds.
You can measure one of two ways:
- Have a friend mark down how close you can get to the line between your heels (represented as a negative number if you can’t reach over the line, and a positive number if you can reach over)
- Lay a yardstick or measuring tape down from your groin straight out on the floor, and measure how many inches (or cm) you get from your groin straight out.
Solo tip: If you are by yourself you can use a piece of tape that you hold in the tip of your finger and press into the ground as close to the max reach as possible, and then measure the distance from the line after you get up.
Benchmark #2: Toe Touch
- Stand straight with your legs about hip width apart. You want your legs to be straight, but don’t aggressively lock out your knees either – this feels slightly bent to a lot of people.
- Begin by engaging the front of your legs (your quads) and bending and leaning forward towards the ground.
- Let your body rest naturally, as if you were a ragdoll. Keeping your hands relatively close together, straighten your fingers and begin to stretch down slowly to the ground.
- Do this 2-3 times to get warmed up. Try to keep your legs straight by flexing/activating your quads; keep your legs straight, without your knees locked. If you’re not quite sure how to ‘activate your quads’, try putting a pillow between your legs and holding it there with your legs while you complete this movement!
- Don’t bend your knees to help you get closer to the ground either! I’m watching you. If you’re videotaping yourself on these to track your progress, note that depending on your body (and your hamstrings) your legs may not look 100% straight. Don’t lock your knees out to make them look straighter!
- When you are ready, reach towards the ground and hold it for a few seconds.
Measure the distance in one of the following ways:
- If you aren’t touching the ground, have a friend measure the distance from your tip of your fingers to the ground. If you don’t have a friend with you, place your hands on your legs and note where the tips of your fingers end up.
- If you can touch the ground, you’ll want to flatten your hands as much as possible, and record the distance from the top of your head to the ground. As you can stretch further, the top of your head will actually get closer and closer to the ground.
- If this seems easy, try hugging your calves and pulling your head in towards your body.
Want to improve today’s benchmarks? Here’s how…
To improve your benchmarks in today’s email, you can do the movements above (the sit and reach and toe touch).
In addition to those movements, things like yoga classes and the following poses from Nerd Fitness Yoga) can help stretch and strengthen your lower back, hips, hamstrings. Feel free to do these movements throughout your day, after you strength train, in between coding sessions at work, whenever and wherever! The important thing is to DO THEM!
Wide Leg Rag Doll (hold for 10 seconds, sway in and out lightly)
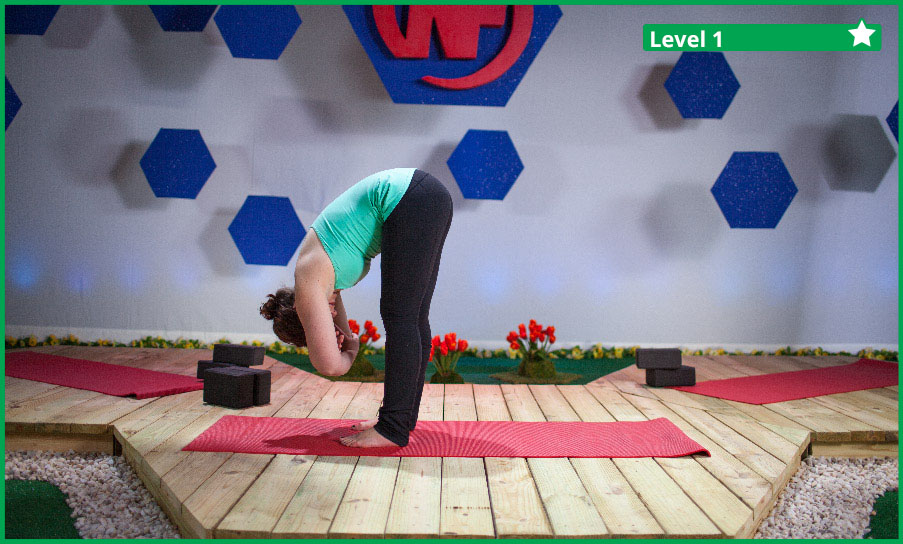
Rag Doll is a sister pose of the more common Forward Fold pose, but allows you to stretch and strengthen from a slightly different angle and depth. In this variation, you’ll be doing it in a wide leg stance. This pose primarily focuses on stretching the lower back, hips, hamstrings, and shoulders.
- Start standing and gently bend forward. As you fold towards the ground, keep your legs straight (but not locking out your knees).
- As you come to rest in the fold, your right hand will cup your left elbow and your left hand with cup your right elbow. You can hold on – but don’t squeeze too hard!
- You can gently sway side to side, forward and back, and up and down. You can also bend and unbend your knees (both at a time or one at a time) as a part of this.
To scale this down, you will only be bending forward into the fold as far as you can go. If you can’t cross your arms, bring them to the front of your thighs and just practice folding gently forward.
Star Toe Touches (10 on each side)
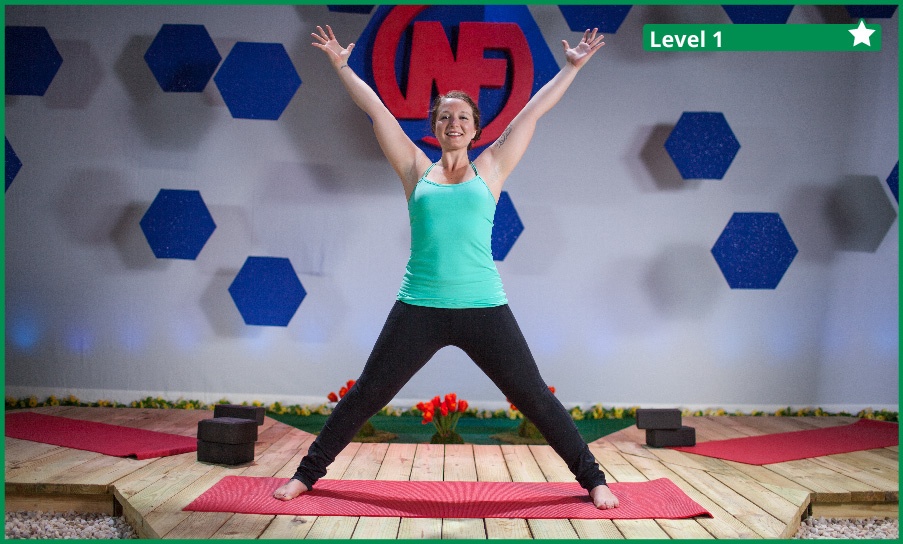
Star Toe Touches, often called alternating toe touches, is a small series of movements meant to help open up your hips, lengthen your hamstrings, and loosen your lower back and shoulders.
- Starting in what we call Star Pose, your feet will be a little wider than your hips and shoulders, but still comfortable in all areas. You arms will be straight out to your sides, parallel to the ground.
- As you bend forward and lengthen your torso, rotate slightly to one side and bring your hand (with straight arms) down and touch your opposite toe. Reverse your twist and come back up to Star Pose standing upright.
- Alternate to the other side, twisting gently the other way and using your other hand to touch the opposite toes. You legs should stay active, but don’t lock your knees out.
To scale this down, simply raise the point on your leg that you touch as you bend forward. You can touch your shins, your knees, and your thighs with your opposite hand as you bend and get used to the movement. As you gain more flexibility and practice, you’ll be able to reach lower.
——
And that’s it for today!
Make sure to record your benchmarks and we’ll see you tomorrow for the next two!
-Steve and the rest of the team at Nerd Fitness