Pull-ups are my favorite exercise of all time.
But what if you can’t do a pull-up yet?
The answer: read this ultimate guide on getting your first pull–up ASAP!
We have helped hundreds of Online Coaching Clients get their first pull-up, and we’ll cover our exact strategies below!
As part of our Strength Training 101 series, we give you an exact plan to follow leading you to your very first full pull-up:
- Tips on how to start doing pull-ups.
- Level 1 Pull-up Workout: Bent Over Dumbbell Rows
- Level 2 Pull-up Workout: Inverted Bodyweight Rows
- Level 3 Pull-up Workout: Assisted Pull-ups
- Level 4 Pull-up Workout: Top Holds and Bar Hangs
- Level 5 Pull-up Workout: Negative Pull-ups
- Level 6: Doing Your First Pull-up or Chin-Up
- Level 7: Advanced Pull-up Moves
If you can already do a pull-up (woot!), you might want to check out our article on proper pull-up form, although we’ll cover a lot of the same material here.
Let’s do this thang.
(Oh, and if you want a free downloadable version of how to get your first pull-up, which includes details on each of the levels we cover here as well as sample workouts, just tell us where to send it!)
Tips on How to Start Doing Pull-Ups
In the video above, Coach Jim walks you through the exact progression system we use with our coaching clients who want to get their first pull-up (or chin-up).
Before we get into exercises to progress into a pull-up, let’s chat about some general strategies.
Consider the following three points when attempting to get your first chin-up or pull-up:
#1) This should hopefully be obvious, but the more you weigh, the more you have to lift in order to complete a pull-up.
If you’re truly serious about completing a pull-up, start by getting your diet under control.
As we say here at Nerd Fitness, 80-90% of weight loss comes down to what you eat.
Here are some resources to help you with weight loss:
- Tried to lose weight in the past without success? I hear you, weight loss is super tough. Learn why in our article “Why Can’t I Lose Weight?” for a deep dive into the subject. We also have the 5 Rules of Weight Loss to help you get going.
- Not sure what a proper diet looks like? Check out our Guide on Healthy Eating for a full lesson on nutrition.
- Wondering if Paleo, Keto, or Veganism can help you with weight loss? They might. Read our guide on determining the perfect diet (for you).
- In the above guides, you’ll find me stating that losing weight comes down to eating fewer calories than you burn. Not sure how many calories you need? Check out our guide on calculating your daily caloric requirements.
#2) MAKE YOUR “PULL” EXERCISES A PRIORITY. A lot of people do every other exercise before doing any back-related exercises, if they do any at all.
After warming up properly, your first exercise should always be the stuff that you want to work on the most – in this case, it’ll be your back muscles.
Until you get your first pull-up done, focus on the back exercises detailed in the levels and workouts in this guide.
#3) The progression we outline is a path that works for most people, but does NOT need to be followed to a T.
We give sample sets and reps and when to move up, but if you feel like you can progress sooner or want to try doing full pull-ups sooner than we recommend, that’s OKAY.
This is the slower progression method, where some people will want to do fewer reps and progress to the next levels sooner – that’s okay.
We recommend moving up to the next level when you can do 3 sets of 8 reps of a particular exercise. If you want the accelerated path, move on up as faster as you can do 3 sets of 5 reps. You do you boo.

Want someone to build you a custom-made progression plan for doing your first pull-up? Our 1-on-1 Online Coaching Program will do just that, plus your coach can review your movements through our app so you’ll know your training correctly and safely.
Level 1 Pull-up Workout: Bent Over Dumbbell Rows
We’re going to start with bent-over dumbbell rows, the most basic of back exercises, in case you’re starting from ABSOLUTELY square one.
Level 1 Pull-up Workout:
- Bent-over dumbbell rows: 8 reps for each arm (or as many as you can do)
- Rest for a 2-minute break
- Do another set
- Repeat until you hit 3 sets
What weight should you start out with initially?
Whatever allows you to get to at least 5 reps a set.
Once you can do 3 sets of 8 reps (each arm), it’s time to pick up a heavier dumbbell.
This will allow you to get stronger and stronger.
Make sure you give yourself at least 48 hours until you do the Level 1 Dumbbell Rows again, so you can include these dumbbell rows for your workouts on:
- Monday
- Wednesday
- Friday
As soon as you can do 3 sets of 8 reps, it’s time to move up to a heavier dumbbell.
- Once you can lift a 25-pound (10kg) dumbbell or heavier, consider moving up to the next level.
- If you are a little bit bigger than the average bear, you might want to stick with this step until you lose a little bit more weight and get stronger – maybe go to 35 or 40-pound (18kg) dumbbells.
Level 2 Pull-Up Workout: Inverted Bodyweight Rows
Bodyweight rows are the PERFECT precursor to pull-ups – they work the same muscles, and have you lifting your own bodyweight, just at a different angle.
For this level, we’ll provide you with two options: You can also make adjustments.
OPTION A: IF YOU HAVE ACCESS TO A GYM OR WANT TO JOIN A GYM:
You can follow the rest of this workout as part of our 6-Level Gym workout guide, which will help you go from total gym newbie to pull-up progressing badass!
At your gym, find your Smith Machine and set the bar at about chest height.
A higher bar makes the exercise easier to start:

And as you get stronger, you can set the bar lower:
Here’s a whole post I did on inverted bodyweight rows.
Here’s how to do an inverted bodyweight row:
- Set the bar at a height where it’s challenging for you to complete 3 sets of 8 reps with two minutes of rest between sets.
- Clench your butt and keep your abs tight and body straight throughout the exercise.
- Pull your shoulder blades down and back towards each other (like you’re trying to pinch a pencil between them behind your back).
- Focus your mind on PULLING with your arms.
- Pull until your chest touches the bar (not your neck).
- As soon as you can complete all 3 sets of 8 reps, set the bar height lower to make the exercise more difficult.
If it helps, here is a video demonstration with gymnastic rings, but you can start with a bar as displayed in the images below.
If you need to make the exercise less challenging, bend your knees and put your feet flat on the ground:

Level 2 sample workout routine:
- Monday – 3 sets of 8 reps of overhand bodyweight rows

- Wednesday – 3 sets of 8 reps of underhand bodyweight rows (hands reversed)
- Friday – 3 sets of 8 reps of overhand bodyweight rows
(And then go underhand, overhand, underhand the following week)
As soon as you’re doing bodyweight rows where your body is at a 45-degree angle or lower, you can progress to Level 3.
OPTION B: IF YOU DON’T HAVE ACCESS TO A GYM FOR INVERTED ROWS:
You have 4 paths here:
1) Purchase a door frame pull-up bar, hang a pair of gymnastic rings from them. And then follow the same advice as above!
2) Use your kitchen table for rows (BE CAREFUL):
3) Do inverted rows between a couple of chairs, as we walk you through in How to Do Pull-ups Without a Bar:

4) Move up to Level 3 and progress with caution there.
If you are struggling with rows, you’re not sure you’re doing them correctly, or you’re not sure how to progress to the next level, check out our 1-on-1 coaching program.
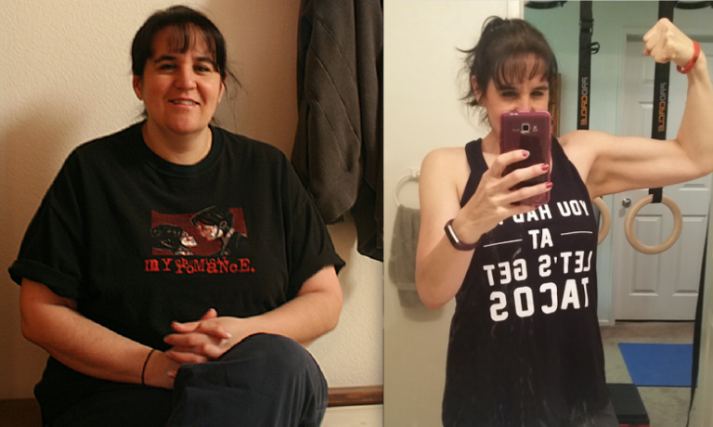
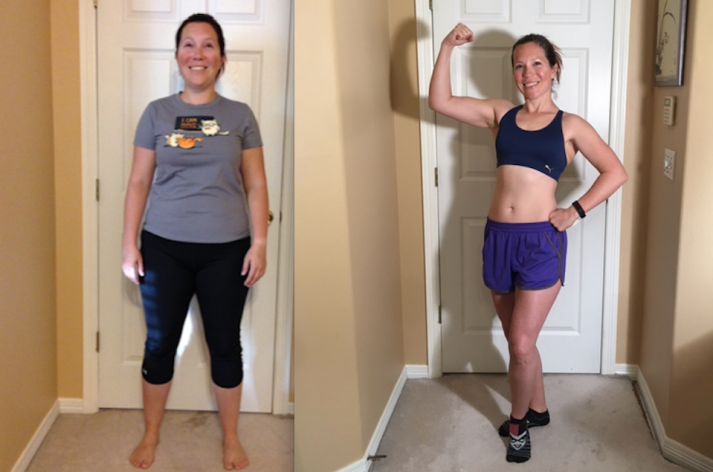
It’s the type of program that helped single mom Leslie lose 100+ pounds and start training with gymnastic rings and handstands!
Level 3 Pull-Up Workout: Assisted Pull-Ups
Okay! It’s time to get to ACTUAL pull-ups here!
Here are a couple of different options to start doing assisted variations of the pull-up:
#1) Assisted Pull-ups with a chair
Either one foot or two on the chair, depending on your needs. Your feet are ONLY there for support, use your upper body as much as possible.
You can also use a box or similar-sized object for the same result:
#2)Assisted Pull-ups with exercise band:
You can get different types of exercise bands with different levels of strength, or a variety pack for easy progression.
Put your foot in the exercise band and pull yourself up.
Here’s a video on How to Tie the Resistance Band for Your Pull-up:
#3) Assisted pull-ups with a partner:

Have a friend hold your feet behind you and help you complete each rep. Have them use the least amount of help possible to get you through your workouts.
#4) Assisted Pull-ups on a Machine
These are a great option as you can keep the assistance at a specific level throughout the entire movement (whereas a band will be easier at the bottom and harder at the top of the movement.)
HERE’S HOW TO DO AN ASSISTED PULL-UP:
- Clench your butt and keep your abs tight throughout the exercise – try not to swing like crazy.
- Keep your shoulder blades pinched behind you throughout the movement and focus on PULLING the bar down with your arms.
- Use the least amount of assistance that you can handle – as soon as you can do multiple pull-ups with both feet on the chair, switch to just one foot.
- If you’re using an exercise band, try to get a few bands of varying tension so you can decrease the resistance as you get stronger.
- As soon as you can do 3 sets of 8 with assistance, it’s time to move on to Level 4.
For another reference, Coach Jim and Staci show you how to do a variation of assisted chin-up right here:
Finally, a workout that includes Level 3 pull-up exercises
- Monday – Assisted Pull-ups – 3 sets of 8 reps
- Wednesday – Inverted Bodyweight Rows – 3 sets of 8 reps
- Friday – Assisted Chin Ups – 3 sets of 8 reps
This is probably the TOUGHEST level before getting your pull-ups. If you get stuck on “assisted pull-ups” and “assisted chin-ups”, you’re not alone. This is where most people get stuck.
Which is why we’ll add in our next two progression sequences to get you over that plateau.
Level 4 Pull-Up Workout: Top holds and Bar Hangs
Alright, so we’ve started off great! We’re working those pulling muscles and assisted variations – but an actual chin-up might feel miles (or kilometers) away.
Heck, just holding onto the bar may be a challenge without some assistance.
What should we do now?
How about we work on holding onto the bar!?!
Before we work on doing full range, unassisted chin-ups or pull-ups, it’s really helpful to be strong and confident in holding unassisted parts of the movement.
This is where Top Holds and Bar Hangs come in!
#1) A Top Hold is exactly what it sounds like – we hold the top position of the chin-up or pull-up for several seconds (5 to 10). You’ll likely find holding the top of the chin-up (palms facing you) easier than the pull-up.
This is definitely something that you want to first do assisted. We’ll then work to transfer more weight – bit by bit over several workouts – off our feet and onto our arms until we’re holding ourselves unassisted at the top.
Using a band is a good option for assisted chin-ups, but using a box, bench, or another sturdy object will be a better option here.
It will allow you to shift that weight onto your arms a little easier.
That said, if all you have is a band for this exercise then that’s ok! Look to use thinner and thinner bands, while lifting the feet and knees up a bit to further reduce assistance (as the band won’t be stretched as far).
#2) On the other side of the movement, we have the Bar Hang…which is pretty much what it sounds like too!
To perform a bar hang:
- Grab the bar with palms facing towards you or away from you. You’ll likely find hanging with palms facing away from you to be a bit more comfortable. Either direction will help strengthen up your grip.
- Just like with the top hold, you’ll want to start assisted then work to shift your weight from your feet onto your arms until you’re hanging unassisted.

To further supercharge this exercise: once you are hanging unassisted, work on retracting your shoulders down away from your ears.
Like so:
And so:
This small movement is TOUGH (and you can even practice it assisted) but getting strong here will set your shoulders in an even better position for your first chin-up/pull-up.
We’ll look to hang from the bar (assisted or unassisted) for a total time of 30 seconds to 1 minute. At first this time may be broken up into several sets (e.g., 10 seconds, 10 seconds, 10 seconds), but you should eventually work up to one full set.
So how should we integrate either of these into our training?
#1) For the Top Holds, do this at the start of your workout (after your warm-up) for 3 sets of 5 seconds. Make sure you give it your all! Really squeeze the muscles tight and put as much weight on the arms as possible!

With all that effort, you’ll want to give yourself 30 seconds to a minute rest in-between. I know that sounds like a lot for just 5 seconds of work – but if you were working hard enough, you’ll need it!
#2) For the Bar Hang, do this at the end of your workout for 30 seconds to a minute. Again, look to complete this in as few sets as possible, while making the exercise as challenging as possible. Move from assisted to unassisted, with the shoulders retracted downwards.
If you have to take a break during the bar hang time, then take enough rest so that the next hold is productive.
Here Are the Exercises You Can Include for Your Level 4 Workout Routine:
Monday:
- Top Hold (Assisted or Unassisted) – 4 sets of 5 seconds
- Assisted Pull-ups – 3 sets of 8 repetitions
- Bar Hang (Assisted or Unassisted) – 30 seconds total time
Wednesday:
- Top hold (Assisted or Unassisted) – 4 sets of 5-10 seconds
- Bodyweight Rows – 3 sets of 8 reps
- Bar Hang (Assisted or Unassisted) – 30 to 60 seconds total time
Friday –
- Top Hold (Assisted or Unassisted) – 4 sets of 5 seconds
- Assisted Chin-ups – 3 sets of 8 reps
- Bar Hang (Assisted or Unassisted) – 30 seconds total time
When you’re able to perform the Top Holds and Bar Hangs unassisted, then it’s time to move to the next level!!!
LEVEL 4.5 PULL-UP WORKOUT: (THE HIDDEN LEVEL)
What’s this??? Secret hidden exercises?
I just wanted to bring your attention to a great addition to any of these workouts – especially as things really ramp up.
Ready for it?
It’s . . . the front plank!
The front plank (or any of your favorite midsection stabilization exercises) is a great exercise to do, should holding a Top Hold or a Bar Hang prove tough.
If you haven’t already felt it during the previous pull-up workouts – your middle needs to be involved too!
During a pull-up or chin-up, if we squeeze through the midsection and glutes, the nearby muscles are able to contract stronger through a phenomenon known as muscle irradiation.
Besides sounding like something the Fantastic Four encountered in space, this cool “trick” can help engaged nearby muscles in the midsection, including those big back muscles that pull us up!
You can see muscle irradiation for yourself if you’ve ever been asked to flex your biceps for someone. You’ll instinctually squeeze your hand tight, because it helps the biceps engage stronger!
If needed, throw in some front planks work near the end of your workout.
You can even start on your knees:
Look to hold 30 seconds to one minute of total time.
Alright, back to our regular scheduled programming!
Level 5 Pull-Up Workout: Negative Pull-Ups
Okay! We are now DANGEROUSLY close to getting our first pull-up!
The big step at this level is doing a negative pull-up:
- Grab onto the bar with an overhand grip
- Jump so your chest is touching
- Slowly lower yourself under control until you’re at the bottom of the movement.
WARNING: This can be very dangerous if you’re very overweight, which is why I’d recommend moving slowly through steps 1-3 first.
However, once you have a decent amount of back strength (which you got from Levels 1, 2, and 3), doing negatives is a great way to build arm and back strength.
You have two options for negative pull-ups:
- Hop up on a chair to get above the bar and then lower yourself back down. The name of the game is “in control.”
- Jump above the pull-up bar, and then begin to lower yourself back down IN CONTROL.
You don’t need to lower yourself so slowly that one repetition destroys you…lower yourself at a controlled speed – Counting to “three Mississippi” during the movement is a good tempo.
Here are the exercises you can include for your Level 5 Workout Routine:
Monday:
- Negative Pull-ups – 4 sets of 1 rep
- Assisted Pull-ups – 3 sets of 8 reps
- Bar Hang (Unassisted) – 30 seconds total time
Wednesday:
- Top Hold (Unassisted) – 4 sets of 5-10 seconds
- Bodyweight Rows – 3 sets of 8 reps
- Bar Hang (Unassisted) – 60 seconds total time
Friday:
- Negative Chin-ups – 4 sets of 1 rep
- Assisted Chin-ups – 3 sets of 8 reps
- Bar Hang (Unassisted) – 30 seconds total time
Once you’re doing all of the negative repetitions in each exercise…you’re ready to do a pull-up.
As you’ll see above, we’re giving you the “pull” exercises if you are building your own workout. If you want a good beginner gym workout program, these movements will fit in perfectly.
Alternatively, we can do all of the heavy lifting for you (well, not ALL the heavy lifting) – we’ll create a specific workout so all you have to do is log into your NF Coaching App each morning and do the workout your coach prescribed!
Level 6 – Doing Your First Pull-up or Chin-up
OH BOY! My dear Rebel, it’s time for a…
At this point you have two options:
A chin-up is when you grab the bar with an underhand grip with your palms facing towards you.
Many find chin-ups slightly easier than…
A pull-up is when you grab the bar with your palms facing away from you. Seeing as this is a pull-up guide…
HOW TO DO A PULL-UP, STEP-BY-STEP:
- Grab the bar with a grip slightly wider than shoulder-width, with your hands facing away from you.
- Start from a dead hang.
- Engage your shoulders, pull them down and back towards each other (like you are pinching a pencil between your shoulder blades!)
- Flex your stomach, pull your body until your chest touches the bar.
- Slight pause, yell out “I’m a champion!”
- Lower yourself all the way back down to a dead hang.
We cover all of this and more in our post “How to Do a Proper Pull-Up,” but the above will get you started
Depending on your weight, your level of fitness and strength, and how far along you are in these progressions, you might be able to start with even more than one pull-up.
At this point, you can be a full Gym Class Hero by following a Gym Workout with these movements in there for your “pull” exercises:
Level 6 routine weekly schedule:
Monday:
- Pull-ups – 4 sets of 1-2 reps (move onto the next exercise if you can’t perform a rep)
- Assisted Pull-ups – 3 sets of 8 reps
- Bar Hang (Unassisted) – 60 seconds total time
Wednesday:
- Negative Chin-ups – 4 sets of 1 rep
- Bodyweight Rows – 3 sets of 8 reps
- Bar Hang (Unassisted) – 60 seconds total time
Friday:
- Chin-ups – 4 sets of 1-2 reps (move on to the next exercise if you can’t perform a rep)
- Assisted Chin-ups – 3 sets of 8 reps
- Bar Hang (Unassisted) – 60 seconds total time
Congratulations! You’re now doing pull-ups. Make sure you watch the video above to make sure you’re doing pull-ups with proper form. Nearly everybody does them incorrectly, with bad form.
But what if you’re feeling stuck between Level 5 and achieving your first full pull-up? Don’t worry, we got you covered.
Here’s a couple of additional tips to help you break through that plateau:
- Add more reps/sets – if you feel stuck and like you can’t get to your full pull-ups still, try adding more reps or an additional set to your workouts. More work = stronger muscles = more
- Slow the movement down – more time under tension = more control through the full range of motion! You can use this not only on your negative reps but on your assisted pull-up and inverted row progressions too. Think 3 seconds on the way up and down.
- Make sure you pull your shoulders down away from your ears – it may sound like a small thing, but many people get “stuck” here because they don’t set their shoulders in a good pulling position! Practice this by hanging from a bar, relaxing your shoulders so they cover your ears, and then strongly pulling your shoulders down and back so they end up away from your ears.
Add these additional tricks in, and you’ll be on your way to a full pull-up in no time!
Level 7 – Advanced Pull-up Moves

Once you’re able to do 3 sets of 10 pull-ups or chin-ups, you have a few options:
OPTION #A: Continue to get better at doing more reps – 3 sets of 12, 3 sets of 15, 4 sets of 20, etc.
OPTION #B: Start doing other types of pull-ups.
Here are some advanced pull-ups you can try:
#1) WIDE GRIP PULL-UPS (grab the bar WAY out with both hands):

#3) SIDE TO SIDE PULL-UPS
#4) RING PULL-UPS
#5) TOWEL PULL-UPS (Great for grip strength)
OPTION #C) Add weight with a weight belt and do weighted pull-ups or weighted chin-ups:
Personally, my favorite thing to do in a gym is weighted pull-ups; if you’re at this level and interested in doing so, here’s what you need to do:
- Get a weight belt. I bought this one on Amazon and it’s worked out incredibly well for me. I’ve tried doing the whole “put weights in a backpack” and it certainly works, but the angle of the weights hanging off your back is weird. With a weight belt, the weight hangs down between your legs (not a euphemism) so it feels more natural.
- Add small amounts at a time. Most gyms will have 2.5 lb (roughly 1kg) weights; you might feel stupid putting on a big weight belt and only hanging a tiny weight off it, but you need to start somewhere.
- Consistently add more weight. I’ll warm up with two sets of 5 pull-ups with no extra weight, and then do 3 sets of 5 weighted pull-ups. If I can complete all 3 sets of 5 reps (with my chin over the bar for every rep), I’ll make a note to add 2.5 or 5lbs (1 or 2kg) to my weight belt for the next time.
Here’s how to incorporate these Level 6 exercises into your gym workout routine:
- Monday – Weighted Chin Ups – 3 sets of 5 reps
- Wednesday – Elevated Feet Body Weight Rows – 3 sets of max repetitions
- Friday – Wide Grip Pull-ups – 3 sets of maximum repetition
- (The following week, I’d alternate by doing the chin-ups without weight, and then doing weighted pull-ups
Where do you go from here? How about working towards one of the most impressive exercises of all time? The MUSCLE UP (warning: uber advanced)!
Lift Yourself Up (A Life With Pull-Ups)

No matter your starting point, you CAN do pull-ups.
And you WILL do pull-ups with this guide.
You don’t need to follow the progression above exactly – it’s merely one path that you can take in order to reach the promised land…where the pull-ups flow like wine and the women instinctively flock like the Salmon of Capistrano.

Just ask Christina, who can now do multiple sets of pull-ups – her story is incredible:
Or Bronwyn, who lost 50+ lbs and now does chin-ups with her daughter on her back!
For people looking for the next step, we’ve built 2 options that might float your boat:
1) If you are somebody who wants to get results like the women above and follow a tailor-made pull-up strength program designed around their life and goals, check out our popular 1-on-1 Online Coaching Program.
You’ll work with our certified NF instructors who will get to know you better than you know yourself, check your form, and program your workouts and nutrition for you.
2) Join our free community, the Nerd Fitness Rebellion, and we’ll send you our free Strength 101 Guide, which you can get when you sign up in the box below:
Follow the path that works for your schedule, your experience, and your level of comfort with this movement – there’s no shame in going slowly and progressing safely.
And if you’re gung ho about pull-ups, ready for negatives and trying to squirm for that first rep, feel free to go for it. Just be safe.
When you DO finally do a pull-up, I want to be the first to know – email me at [email protected] and tell me about it!
For the Rebellion,
-Steve
PS: Check out our other three articles on pull-ups:
- How to Do a Proper Pull-up (Correct Form)
- 5 Common Pull-Up Mistakes
- How to Do Pull-ups Without a Bar
PPS: Want to learn more? Read the rest of the Strength Training 101 series:
- Strength Training 101: Beginner Strength Workouts
- 6 Gym Workouts for Beginners
- How to Find a Good Personal Trainer
- Strength Training 101: Inverted Rows
- Strength Training 101: How to Squat
- Strength Training 101: The Press
- Strength Training 101: The Deadlift
###
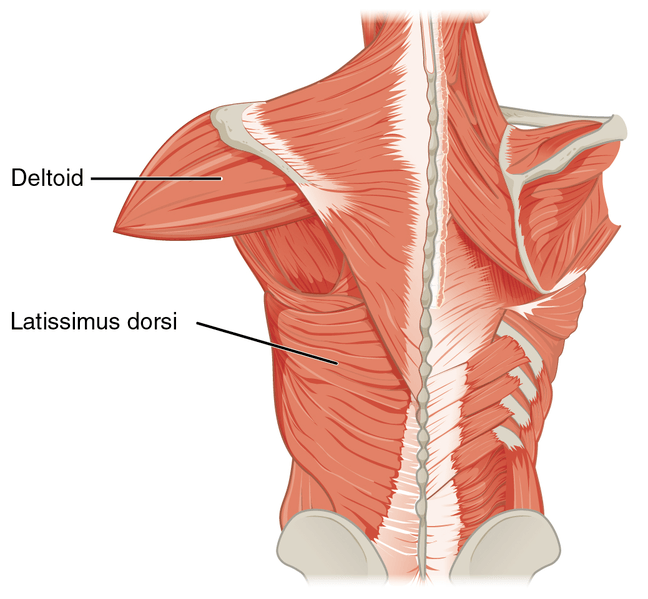
Photo Souce: Muscles that Move the Humerus