It’s time to learn some yoga poses!
Whether you’re comfortable on a yoga mat or you think a downward dog is just something your puppy does, you’re in the right place.
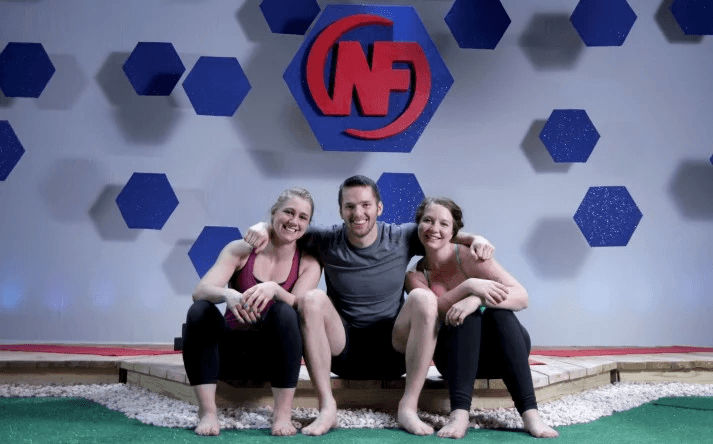
We teach yoga in our Online Coaching Program where some of our clients have used it to improve their back pain…like Brain here:

He also switched up his diet and lost 75 pounds!
I can’t wait to help you get started.
Today’s yoga poses will be broken out into three levels, for you to progress in difficulty.
What can I say, we love leveling up here at Nerd Fitness. Most of our poses are basic, Level One, in case you are completely new to yoga. However, we’ll include a few more advanced poses so you can take it further.
We’ll start by discussing a little Yoga 101, in case you are totally lost right now and don’t know yoga from yogurt. If you wanna skip to your desired video or pose, just click on it.
Beginner Yoga Workout:
Basic Yoga Poses (Level 1)
- Seated Cross Legged
- Table Top Cat-Cow
- Child’s Pose
- Forward Fold
- Standing
- Standing Mountain
- Cobra
- Low Lunge
- Knee Hug
- Corpse Pose
Beginner Yoga Poses (Level 2)
Intermediate Yoga Poses (Level 3)
Yoga Stretches for Desk Workers
Roll out the matt! Let’s do some yoga.
WHAT IS YOGA EXACTLY?

Yoga means lots of different things to different people… like Windfarm Yoga apparently, to the woman in the photo above. As one commenter from Cracked pointed out:
“The only thing I know for sure about yoga is that whatever you’re doing when you practice it, you’ll be assured by someone that it isn’t “real yoga.”[1]
I’m not interested in that particular aspect of the yoga debate: people need things to argue about and get offended over…because Internet. What’s important to me is getting more people interested in trying yoga out because it’s damn fun and can really improve your life.
After all, as Vox explains:
“Yoga seems to help alleviate lower back pain, improve strength and flexibility, and reduce inflammation in the body — which, in turn, can help stave off chronic disease and death.
Emerging research suggests yoga can increase body awareness, or attention to the sensations and things going on inside you. That’s no small matter: Researchers think heightened body awareness can improve how well people take care of themselves.”[2]
Science is essentially telling us: Yoga can help you become more flexible like Black Widow, improve your strength like the Hulk, extend your life like the elves of Rivendell, and give you mental awareness like Yoda.
The jury is still out as to whether or not it grants us telekinetic powers.
Please email me if a yoga practice helps you levitate rocks.
When I approached yoga years ago as an attempt to improve my flexibility and to combat poor posture, I was initially worried about looking foolish or finding some aspect of the exercise that didn’t sit right with me.
Instead, I found a complimentary, enjoyable activity that helped improve my flexibility and mobility, alleviated my lower back pain, opened up my hips to combat a lifetime of sitting, and even helped me quiet my overactive mind!
Plus, it was like a power-up for my strength workouts.
It’s now an activity I do with regularity throughout my week, incorporating yoga stretches during the day in between desk sessions, after working out, and attending the occasional class to level up.
WHY SHOULD I CARE ABOUT YOGA?
If you read Nerd Fitness, you’re probably a skeptic. After all, one of the Rules of the Rebellion is to question everything!
So you might be thinking: “Steve, you’re not going to ask me to start speaking in mantras, chanting OMMMMMM, and work on improving my spiritual chi.”
As somebody who started yoga with the exact same reservations, I sit before you a changed man. For starters, if you decide the spiritual aspects of the practice aren’t for you, you’re not alone: research into yoga’s history can lead down an internet rabbit hole of controversy that is bottomless.[3]
So we’re not going to jump in that fight.
Instead, what you will find when it comes to yoga is study after study showing that this form of exercise rocks.
Here’s why yoga is beneficial:
1) A body prepared to handle anything: at Nerd Fitness, we are huge fans of strength training, and yoga is its perfect compliment. It elongates your muscles, improves your flexibility, can release tension in your neck and shoulders, and helps you do things like touch your toes![4] It can help you build stronger muscles, improve balance and stability (especially for our older rebels[5]), and make you more “antifragile” (one of my favorite terms).
As one study points out:[6]
Yoga subjects exhibited increased deadlift strength, substantially increased lower back/hamstring flexibility, increased shoulder flexibility, and modestly decreased body fat compared with control group.
2) Yoga is great for lower back pain: If you’re one of the 31+ million people like myself who struggle with lower back pain, yoga can help.[7] Yoga really helps those of us stuck at a computer all day long as well.[8]

3) Yoga can help meet weight loss goals when combined with a healthy diet. Look, we all know our diet is responsible for 80-90% of our success when it comes to weight loss. The other 10-20% of the equation is participating in physical activities that push your body outside its comfort zone.
Yoga is a great way to burn a few extra calories and keep your brain focused on “I am doing healthy things and thus I should be eating healthy foods!” It can help improve our fight against cardiovascular disease, hypertension, and obesity.[9] It’s also a great rest day activity to keep you on track when you’re not doing your other workouts.
4) Speaking of which…yoga can be done every single day, and can be done anywhere. No gym required, no equipment required – no excuses! On top of that, because it’s a low-impact activity and doesn’t overly tax your muscles like a powerlifting session, you can do yoga every single day, anywhere you can find a soft place to sit down: your living room, a park, a beach, your bedroom, on the moon, etc.
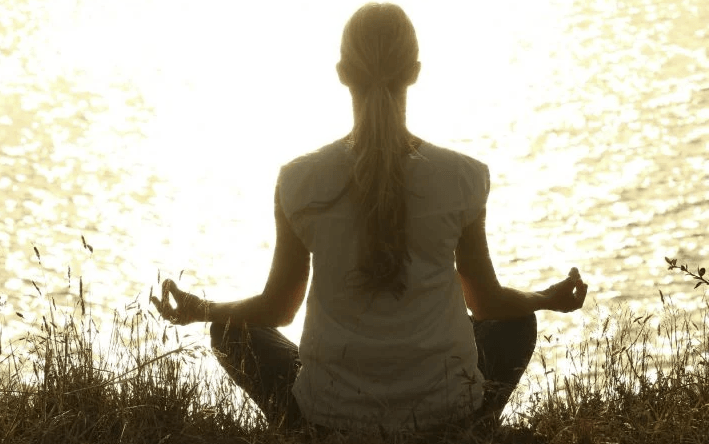
5) Yoga can quiet an overactive mind: We live in a world with a distraction around every corner; we read Facebook or our favorite blog while checking email and texts… while trying to work a day job. If you’re anything like me, your mind races a million miles an hour, and trying to develop a sense of control and calm over your mind is like herding cats. We’ve already explained the benefits of Meditation for Nerds; yoga can be tremendously helpful with becoming more aware of our bodies and help with reducing stress and anxiety.[10]
Lastly, if yoga is good enough for badass Dhalsim from Street Fighter II, it’s good enough for me:
Alright, I’m going to assume at this point you are on board with yoga. If being able to completely demolish a car with your bare hands doesn’t convince you, nothing will.[11]
So let’s go over some yoga poses and routines.
A YOGA ROUTINE FOR BEGINNERS YOU CAN DO AT HOME
We’ll start out our explanation of different yoga poses by showing you what the end result can look like.
Here’s a complete routine covering some basic yoga poses:
The above video (Water Series – A) is taken from our course, Nerd Fitness Yoga (a part of Nerd Fitness Prime). If you like it, I’d encourage you to go browse the page and check it out.
Nerd Fitness Yoga is a course you can follow along within the comfort of your own home, and it’s built specifically for members of the Rebellion: easy to follow instructions, an inviting attitude, and as you can tell… some corny jokes from yours truly.
This course will work for men and women of all shapes, ages, and sizes, giving anybody the confidence to get started IMMEDIATELY. Follow it regularly and you can expect the benefits of the dozens of studies I linked above when it comes to yoga practice.

In addition to a HUGE pose library and step-by-step instructions, it also contains all of the following full-length yoga sessions filmed in HD:
- Water sessions: Two beginner yoga videos (25 minutes each, first one was above)
- Fire sessions: Two intermediate yoga videos (30 minutes each)
- Star sessions: Two advanced yoga videos (40 minutes each)
- Deep stretching routine (40 minutes)
- 6 supplemental mobility videos (that will help with lower back mobility, how to finally touch your toes, and so on. Two of which are below.)
All of these videos can be streamed or downloaded to any device as many times as you’d like so you can practice yoga wherever, whenever.
10 BEGINNER YOGA POSES (LEVEL 1)
#1) Seated Cross Legged

One of the most popular yoga poses is simply Seated Cross Legged.
A seated position helps relax, reset, and open your hips up a bit.
Bring yourself down to a seat on the floor, whatever is most comfortable. Cross one ankle of the other in front of you and sit cross-legged.
Take a big breath in and straighten your spine as if there was a string pulling your head and neck up to the ceiling. Breathe out, but keep that upright posture.
Hands can rest on your knees, but shouldn’t push out or pressure your legs.
#2) Table Top Cat-Cow
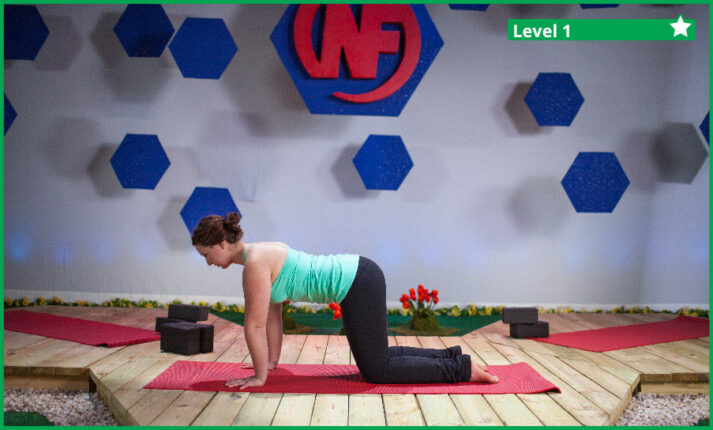
This is actually a series of a few poses (Table Top, Cat, & Cow) that is used in almost every yoga session to help reset your spines and warm up your back.
Start in Table Top, with your hands under your shoulders and your knees under your hips. Your spine should be parallel with the floor to start.
Exhale and slowly press into your hands as you abs up towards your spine. Round your spine to the ceiling as you bring your chin towards your chest. Gently push out your shoulders.
Inhale and relax your abs while you bring your hips back down. Lengthen your torso as your head comes up and looks towards the ceiling. Your chest should come forward slightly and your lower back should push into your pelvis.
Relax and return back to a neutral Table Top position.
#3) Child’s Pose
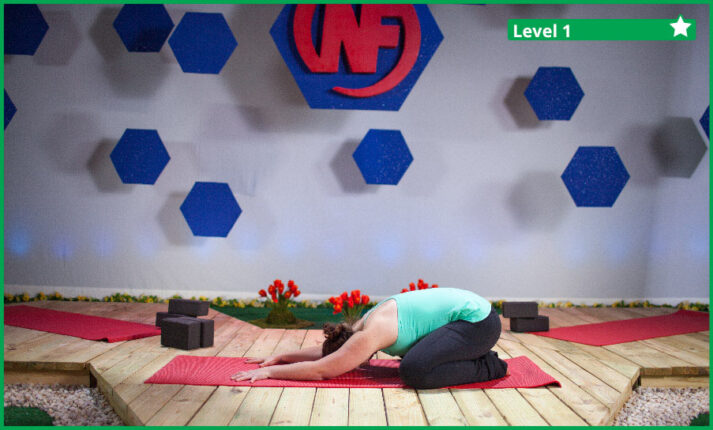
Child’s Pose is considered a resting position. This means that any time you feel overwhelmed, overheated, or stressed about a particular pose or variation while doing yoga, STOP what you are doing and come slowly into a Child’s Pose to rest.
This pose helps lower stress, refocus your mind, and lightly stretch primarily your lower back, hips, and thighs.
Start by kneeling on the floor with your toes touching behind you. Widen your knees so they are just a little wider than your hips. Gently lower your body between your knees and hips.
Your arms will stretch out lightly in front of you and you can drop your shoulders to the sides and down.
A variation you can use (which may be easier or harder for you) is to tuck your toes under your feet, instead of having the tops or side of your feet against the ground. Do whichever variation is most comfortable and natural for your body.
#4) Forward Fold
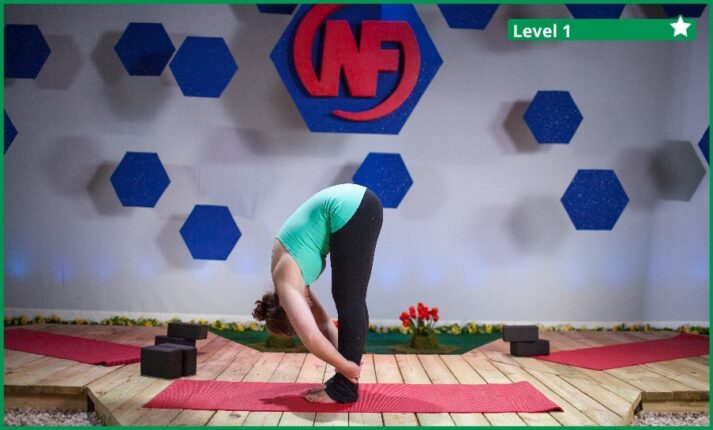
Forward Fold is another one of our most popular yoga poses. It’s primarily focused on stretching the lower back, hips, hamstrings, and calves.
Start standing and gently bend forward as you lengthen your torso and spine. As you fold towards the ground, keep your knees straight (but not locked out). If you can, grab the back of your calves and gently pull yourself deeper into the fold.
As you breathe in, you can lift slightly and extend your torso and spine forwards. As you exhale, you can fold forward again into the stretch.
To scale this down, you may use blocks to help raise the floor. Keep your knees straight and your spine long, and fold as far as you can comfortably go.
#5) Standing
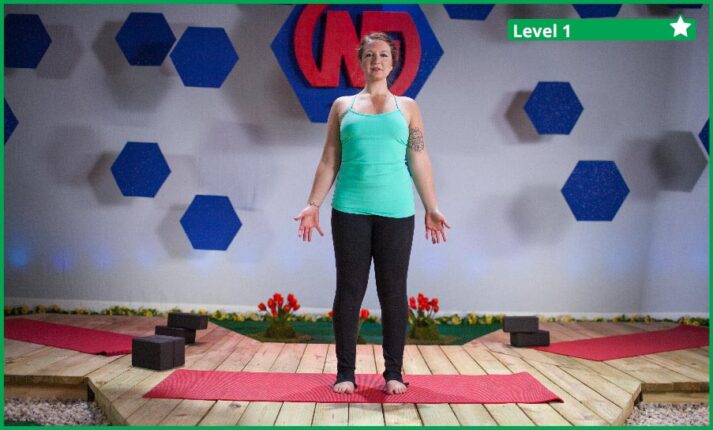
Standing pose is a resting and centering pose in yoga, but don’t take it for granted.
Even when we are standing in between poses, be sure to stay strong, active, and rooted through your feet. Your feet should also be flat and not rolled in or bowed out.
Activate your hips to prevent locking out your knees and keep your posture and spine tall and elevated.
Finally, your shoulder should be open and your chest broad. Neck in line with your spine (not hunched forward). Stretch tall from your hips through your head.
#6) Standing Mountain
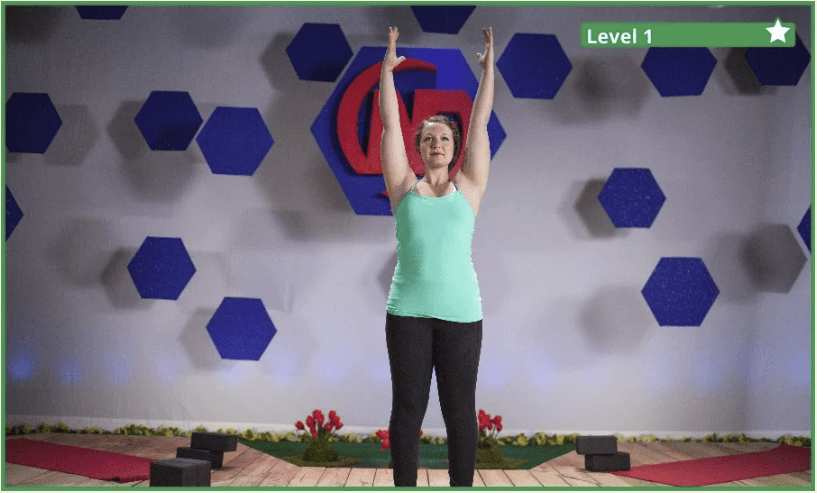
Standing Mountain is a great pose to warm up our shoulders and spine.
Start by staying strong and rooted through your feet (which are flat on the ground). Legs active, but not locked out. Shoulders open and neck in line with spine.
As you take a deep breath, bring both arms straight out in front of you and up overhead towards the ceiling. Make sure your shoulders aren’t hunched and close to your ears, but rather relaxed and released down.
Rooting through your shoulder blades, pull your spine and arms towards the ceiling.
#7) Cobra
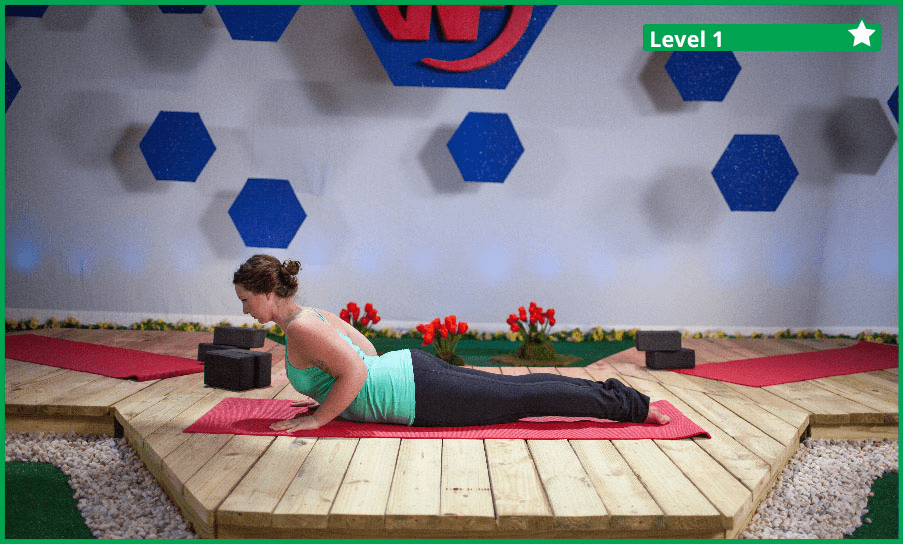
Cobra is a popular pose that almost always follows Plank as a transitional sequence in many yoga sessions.
This pose primarily stretches the shoulders, chest, spine, and stomach.
Start by laying flat on the ground on your belly, with the tops of your feet on the floor. Your hands should be positioned under your shoulders (much like you would imagine starting a pushup).
Slowly push down through your hands and straighten your arms to lift your chest up off the floor, but unlike a push-up, keep your hips, thighs, and tops of feet rooted and pushing down towards the ground.
Move your shoulder blades back, lift your chest, and look forward and slightly up. Hold for several seconds and then slowly release down.
To scale this pose down, only raise your chest and head to where you are comfortable. Be sure to keep your hips and thighs pushing down to the floor, even if that means you can only raise your chest a little.
#8) Low Lunge
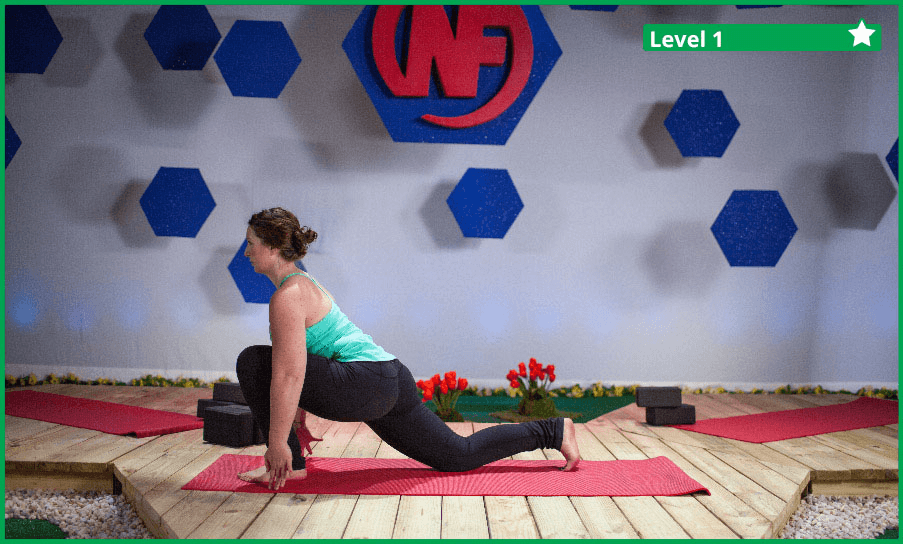
Low Lunge is a variation of Lunge that is a building block for several more advanced poses. It’s most commonly thought of a Lunge with your knee on the ground.
This pose will primarily stretch and strengthen the groin, hamstrings, and hips.
Often, you’ll get into a lunge by starting in a Forward Fold and slowly stepping one of your legs back behind you. If you need to, you can scoot your foot back several times until you are able to have your front knee directly over your front ankle.
As you bring your leg back, drop your back knee to rest on the ground. This will help support some of your weight, but the majority of your weight should stay pushing forward through your front knee and hips.
Bend your torso over your front knee and lengthen your spine forward. Your weight should be pressing down through your heels.
To scale down, you can use blocks on each side to balance yourself more without having to reach all the way down to the floor.
#9) Knee Hug

This pose is used to compress and tighten your body. It’s often used right before Corpse Pose at the end of sessions to reset.
Start this pose by lying on your back with your arms and legs straight out. Take a deep breath and slowly bring your legs together and your knees lifted toward your chest.
As your knee comes up, wrap your arms around them and clasp your hands together. If you can’t quite wrap your arms you can reach down each hand and gently pull in your kneecaps.
Gently squeeze your knees into your chest, keeping your back flat on the ground and dropping your shoulders down. You can focus your eyes down the center of your body.
If for any reason you have trouble doing this, simply raise your knees towards your chest as far as they will go. Hold for a few seconds and release back down.
#10) Corpse Pose
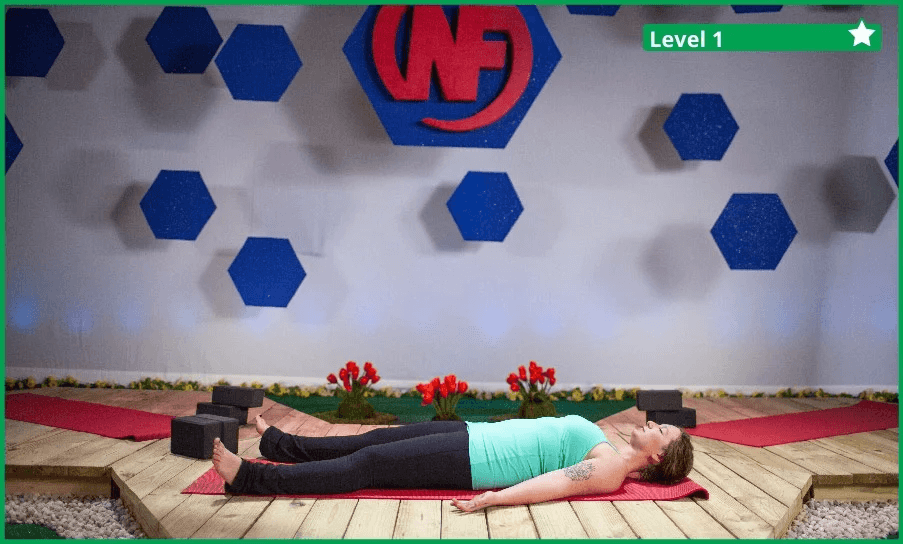
Everyone’s favorite yoga pose, and often a way to end a complete session! And while at first, it can seem like just lying on the ground, there’s more to it than that.
This poses is fantastic for calming the mind, relieving stress, and relaxing the body back into a neutral position.
You’ll have a desire towards the end of a session to skip over Corpse Pose and move on.
Don’t! Spend a few minutes coming back down and resetting your body in each session.
Start by laying on your back. Your arms should stretch down comfortably to each side, slightly away from your body. Both your legs stretched out and with a little space, as well.
Do your best to “release” your shoulders and neck and let them fall neutral as well (even when on our backs we tend to engage our necks).
Focus on your breathing and on relaxing any tight or sore areas of your body.
If you need to, turn onto your side and bend your knees (laying on your side completely). Wiggle your toes, ankles, hands, or wrists as needed.
7 BASIC YOGA POSES (LEVEL 2)
#1) Downward Dog
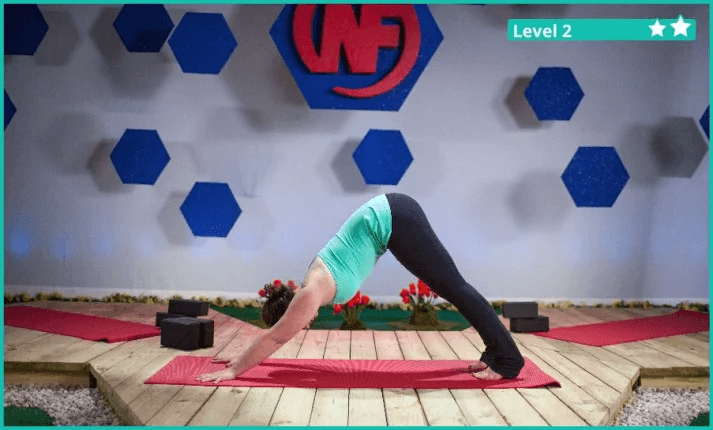
This pose primarily focuses on stretching the shoulders, hamstrings, and calves.
The first few times you get into Downward Dog, you’ll want to start on your hands and knees (what we call Table Top), but with your arms a little bit forward of your head. Pushing into your hands and toes, slowly lift your knees off the ground.
If you can, slowly straighten your knees (don’t lock them) as you gently stretch your heels down to the ground. Once comfortable, you can work your shoulders back toward your tailbone.
To scale this down, you can lift your heels further off the ground and/or bend your knees for easy modification. You can also use blocks to elevate your arms as another alternative.
#2) Crescent Moon
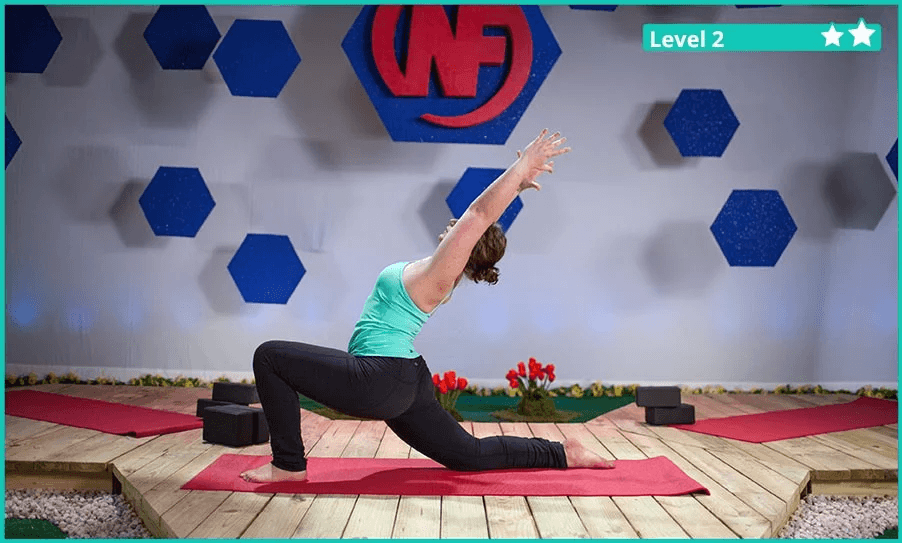
Crescent Moon is a variation of Low Lunge where we stretch upright towards the ceiling.
This pose primarily stretches and strengthens the groin, hips, chest, spine, and shoulders.
To start this pose, you’ll want to get into a comfortable Low Lunge. Usually, this means stepping one leg forward from Downward Dog or stepping one leg back from Forward Fold, and then dropping your back knee down rooted on the ground.
As you take a deep breath, bring your torso up from lunge to upright and stretch both hands straight up toward the ceiling.
Instead of arching your back, draw your hips down and forward and lean your shoulder back (keeping it straight and engaged).
To scale this pose down, you can just stay in Low Lunge and work on stretching without extending upward.
#3) Bridge
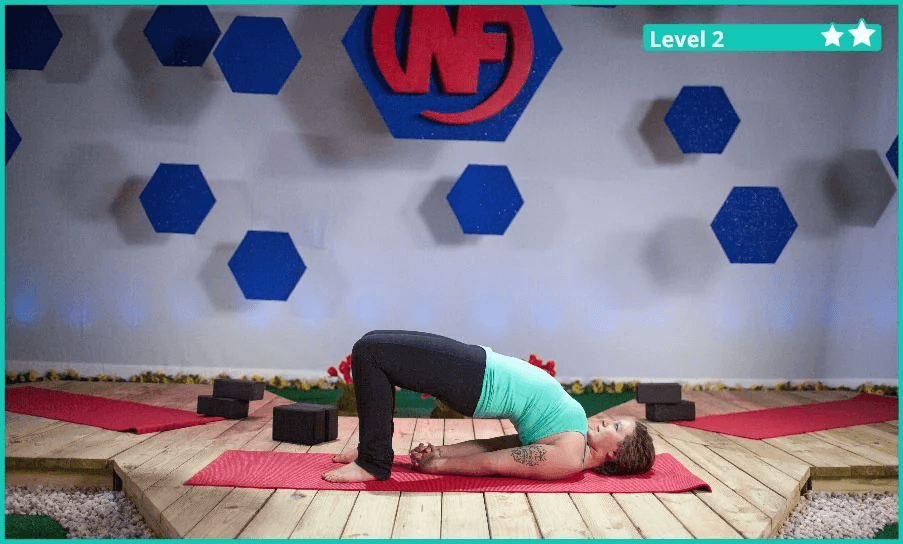
Bridge is a backbend pose that primarily stretches and strengthens the back and spine, but also the chest, shoulders, and neck.
Start by laying flat on your back. Bring your feet flat on the ground as close to your butt as they comfortably sit. Arms should be flat and down to your sides.
Pushing down through your feet and arms, slowly lift your butt off the floor and into Low Bridge (around when your spine is straight with your legs).
If you are comfortable, you can bring your hands together under yourself. Continue to slowly push your hips and butt towards the ceiling, making sure to keep your knees over top of your ankles. Work towards parallel with the ground for the full Bridge pose.
To scale this down, stop in Low Bridge if going further is uncomfortable. If Low Bridge is difficult, just practice moving your hips slightly off the ground from the starting position. As you gain more flexibility, you’ll work to hold in Low Bridge.
#4) Half Splits
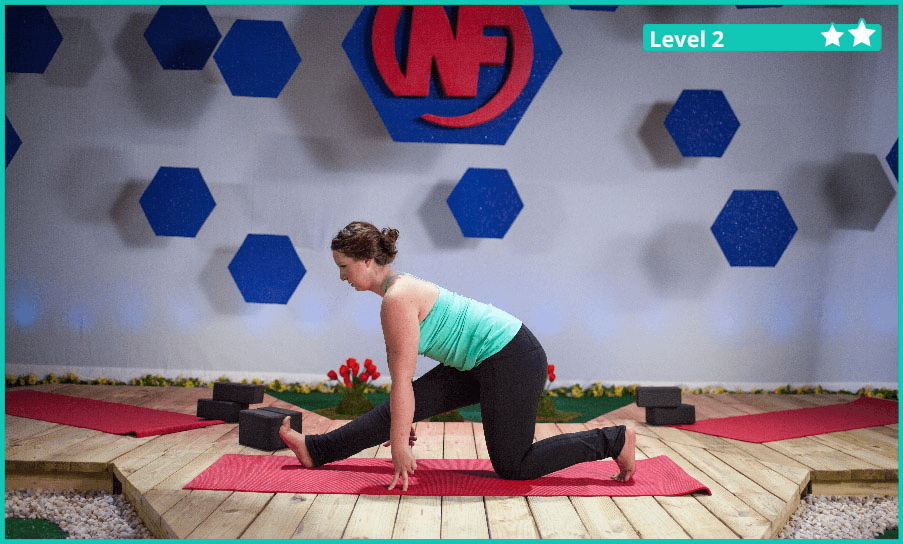
This pose primarily stretches your hamstrings, hips, and lower back.
To start this pose, get into a Low Lunge. Your back knee should be firmly rooted on the ground.
Slowly shift your weight as you move your hips and torso over your back knee. As you do this your front leg will go from bent at the knee to fully extended straight in a line.
If you need them, you can use blocks or a supporting prop on each side now to support your weight (if you can’t reach the ground here).
Slowly fold forward over the top of your extended front leg, with your hips staying rooted back and over top of your knee that’s on the floor.
To scale this down, use blocks on each side as suggested above. You can also stay upright (instead of folding towards the end). Stop in the progression whenever you lose comfort.
#5) Lunge

The Lunge is a major building block for all sorts of yoga poses. Many poses are variations of or come in and out of the Lunge.
This pose will primarily stretch and strengthen the groin, hamstrings, hips, and knees.
Often you will get into lunges starting in a Forward Fold and slowly stepping one of your legs back behind you. If you need to, you can scoot your foot back several times until you are able to have your knee directly over your front ankle.
Bend your torso over your front knee and lengthen your spine forward. Your weight should be pressing down through your heels and your back knee should be active with your knee straight throughout.
To scale down, you can use blocks on each side to balance yourself more without having to reach all the way down to the floor. At any time, you can also drop the back knee down to the ground coming into Low Lunge instead.
#6) Ninja
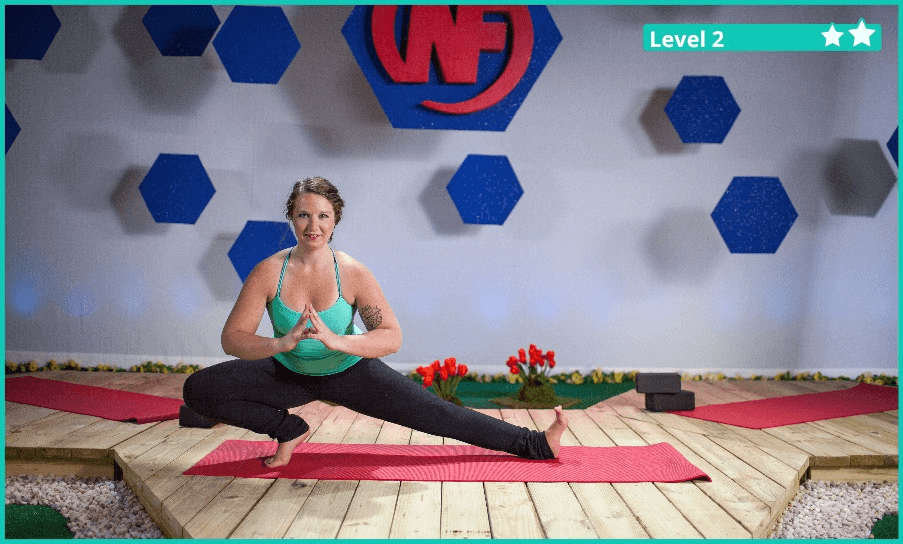
One of the most fun poses to make sound effects while doing, Ninja is actually a series of movements rather than a single pose. You might also have heard it called a Side Lunge, but this is Nerd Fitness, so we’re going with Ninja.
This pose helps strengthen the entire lower body and stretch out the hamstrings.
Start by lowering yourself into a half squat (Frog Prep).
Choose a foot and turn your toes out a little wider. Walk your hands over to your foot. Bend deep into that side’s knee as you lift up onto the heel of your opposite foot. Point or flex that foot up towards the ceiling.
Bring your hands to prayer in front of your chest. Extend both arms out in an upward-facing arc and look towards your extended leg. Hold the pose and keep your leg muscles engaged.
Slowly come back up to Frog Prep (body in the middle) and slide over to the other side repeating the steps above.
#7) Seated Side Fold
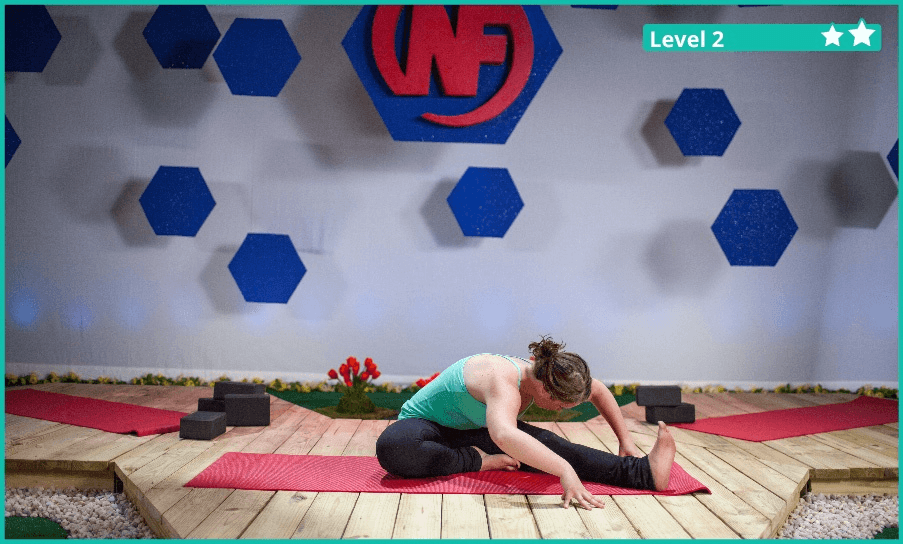
Seated Side Fold is a good, simple combination of a fold and a side stretch in one pose. Sometimes referred to this as “Half Dragonfly” as a nickname.
This pose primarily stretches your spine, lower back, hamstrings, and groin.
Start in a seated position, with your legs outspread wide in a V shape in front of you. About a 90-degree angle between your legs.
Bring one of your feet over to your other thigh, so that the bottom of your foot rests tucked in and touching your thing just above the knee.
Keeping your hips rooted down and your spine extended tall and towards the ceiling, you can gently fold over and use your arms to walk down your chest towards the ground next to the thigh and knee of your fully extended leg.
You should be slightly off-center, in line with your straightened leg (rather than a traditional fold which would come straight to the center).
To scale down this pose, you can stay in the original seated position with both legs out in front of you in a V. Gently fold forward a little to each side and you warm up.
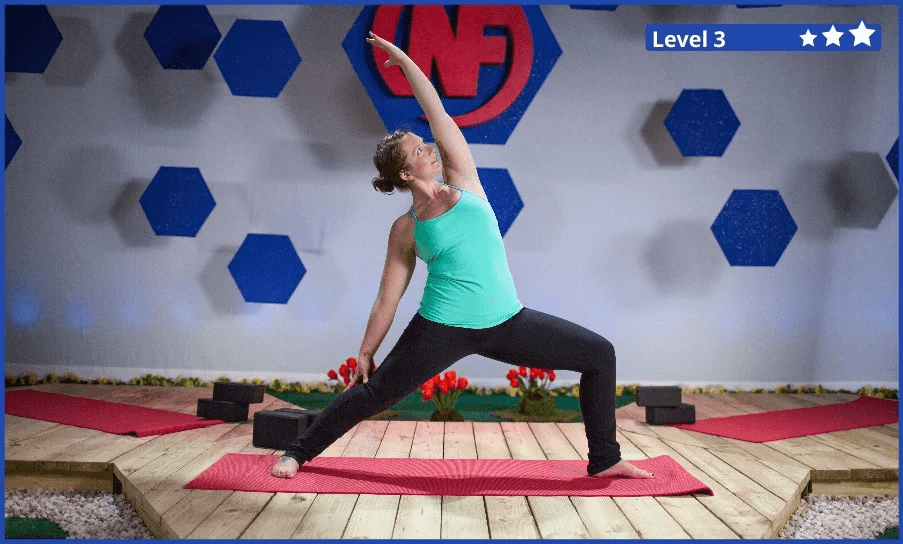
4 INTERMEDIATE YOGA POSES (LEVEL 3)
#1) Chair Pose
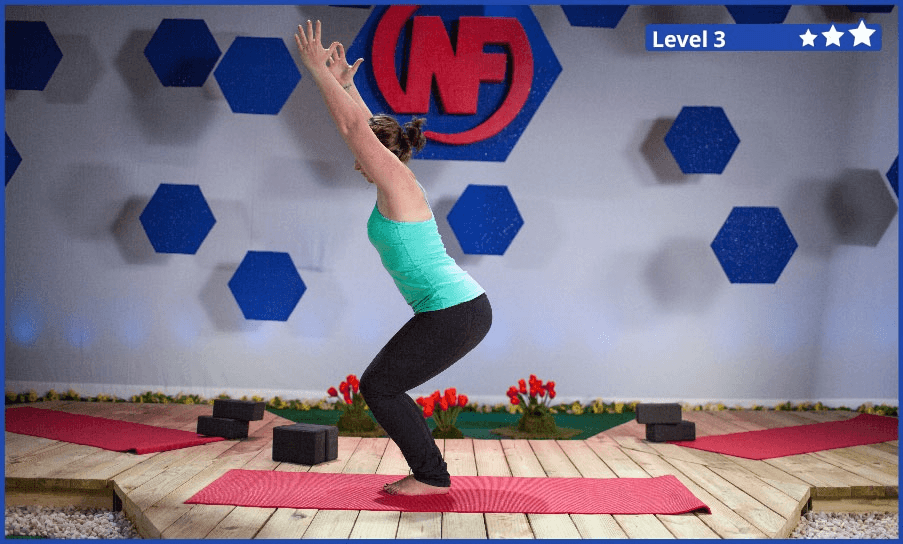
Chair pose is the basis for many of the more advanced moves found in yoga. It primarily stretches the chest and shoulders, while helping to strengthen your core and legs.
Start in Standing with your arms out in front of you. Slowly bend your knees, moving them gradually more forward away from your toes. At the same time, drop your hips and butt back as you try to achieve a 90-degree angle with your thighs and calves.
As you sit down, your arms will come straight above your head (next to your ears), pointing up with palms facing in.
To scale this down, you’ll find it a little easier to keep your arms out in front of you – or coming towards your chest forming a “ball of energy.” Like in Dragonball. Drop your hips only as low as you can comfortably maintain for a stable hold.
#2) Warrior 2

This pose primarily strengthens your shoulders, arm, thighs and opens up your chest and shoulders.
Starting in Standing, exhale as you step one foot back. Align your back heel behind the other heel and then turn your back foot out 90 degrees.
Turn your hips out and align your forward thigh with your forward knee. Slowly raise your arm, one forward and one back, both parallel to the ground.
As you exhale, bend the right knee forward until it lines up straight over your right heel. Press your heels into the floor.
To scale this pose down, you can bring your legs slightly in closer together. You also have the option to bend forward a little less or bring your hands back down onto your hips.
#3) Extended Side Angle
Extended Side Angle is one of our broader Warrior-sequence poses, often done together in pairs or sets with other poses from the same group.
This primarily stretches your groin, back, and torso. It also strengthens your thighs, hips, and legs.
Starting in Standing, spread your legs slightly apart with hips facing forward. Choose one side and rotate that foot outward about 45 degrees.
Bend the knee over the rotated foot and shift your weight to that side. Keep your stretched-out back leg in place and keep pushing down through that foot.
Bring your elbow (same chosen side as the bent knee), down to rest on your bent knee. Your hand and arm coming out in front of you. Your opposite arm now extends high into the air straight overhead.
To scale this pose down, you can narrow your stance a little bit more and bring your hips a little higher in the air. Move deeper down as you get more comfortable.
If you are comfortable enough here to scale up, you can switch your eyes to look at your arm overhead and gently stretch that arm to the side (so it falls in line with your torso and spine).
This will deepen the stretch even further.
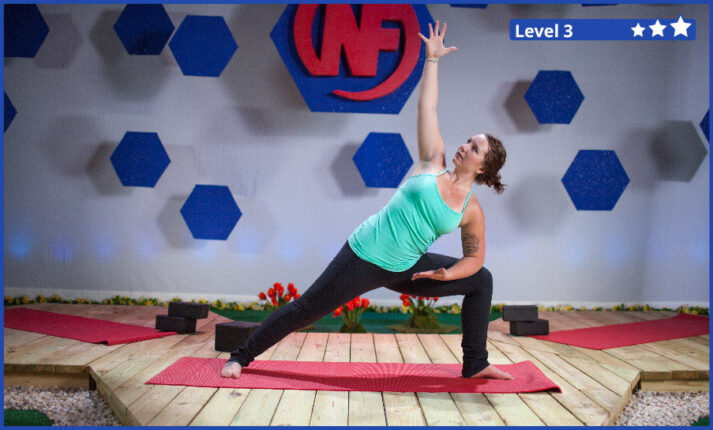
#4) Rebel Warrior
Rebel Warrior is another pose in our Warrior-sequences that are often used in pairs or sets as transitions to one another. You’ll sometimes hear it referred to as “Peaceful Warrior,” but, you know…
This pose primarily stretches the groin, hips, and shoulders.
Start in Warrior 2. Bring the rear hand down to the back leg, palm facing down. Turn the front palm facing upwards towards the sky.
On an inhale, extend the front arm up towards the sky, palm facing towards the back of the room. Keep your hips open, but reach your heart up towards the sky. Keep the back of your neck long and your eye gaze pointing in the same direction as your heart.
Keep bending deeply into your front knee; try to keep the weight evenly distributed on your front foot.
To scale this pose, bring your legs in a little closer together to shorten the depth of the stretch. As you get comfortable you can ease back down into the full pose.
YOGA STRETCHES FOR DESK WORKERS

Work a desk job? Consider these two additional videos:
#1) Yoga for Wrist Mobility
Wrists are an often overlooked area of stiffness and soreness for many people. Whether you type on a keyboard daily or are looking to improve front squats and handstands you’ll benefit from this 6-minute yoga session:
#2) Yoga for Proper Posture
Hours hunched over a computer, stuffed into a car, or playing various games can cause some pretty awkward posture habits. This 6-minute yoga session will help you reset and improve your posture as you go through your day:
When you’re able to escape from your desk for a few, these short sequences are perfect to help stretch out your body and help prevent injury.
If you do find yourself stuck at a computer for most of the day, with seemingly no time to work out, we can help! We offer a 1-on-1 private coaching program to help busy people just like you level up their lives.
We will get to know you, your goals, and your lifestyle, and develop a workout plan that’s specific to not only your body, but also to your schedule and life. We can design workouts for at your desk, or a quick session before dinnertime. If you want to learn more about the program, click on the big image below:
TRY A YOGA POSE TODAY
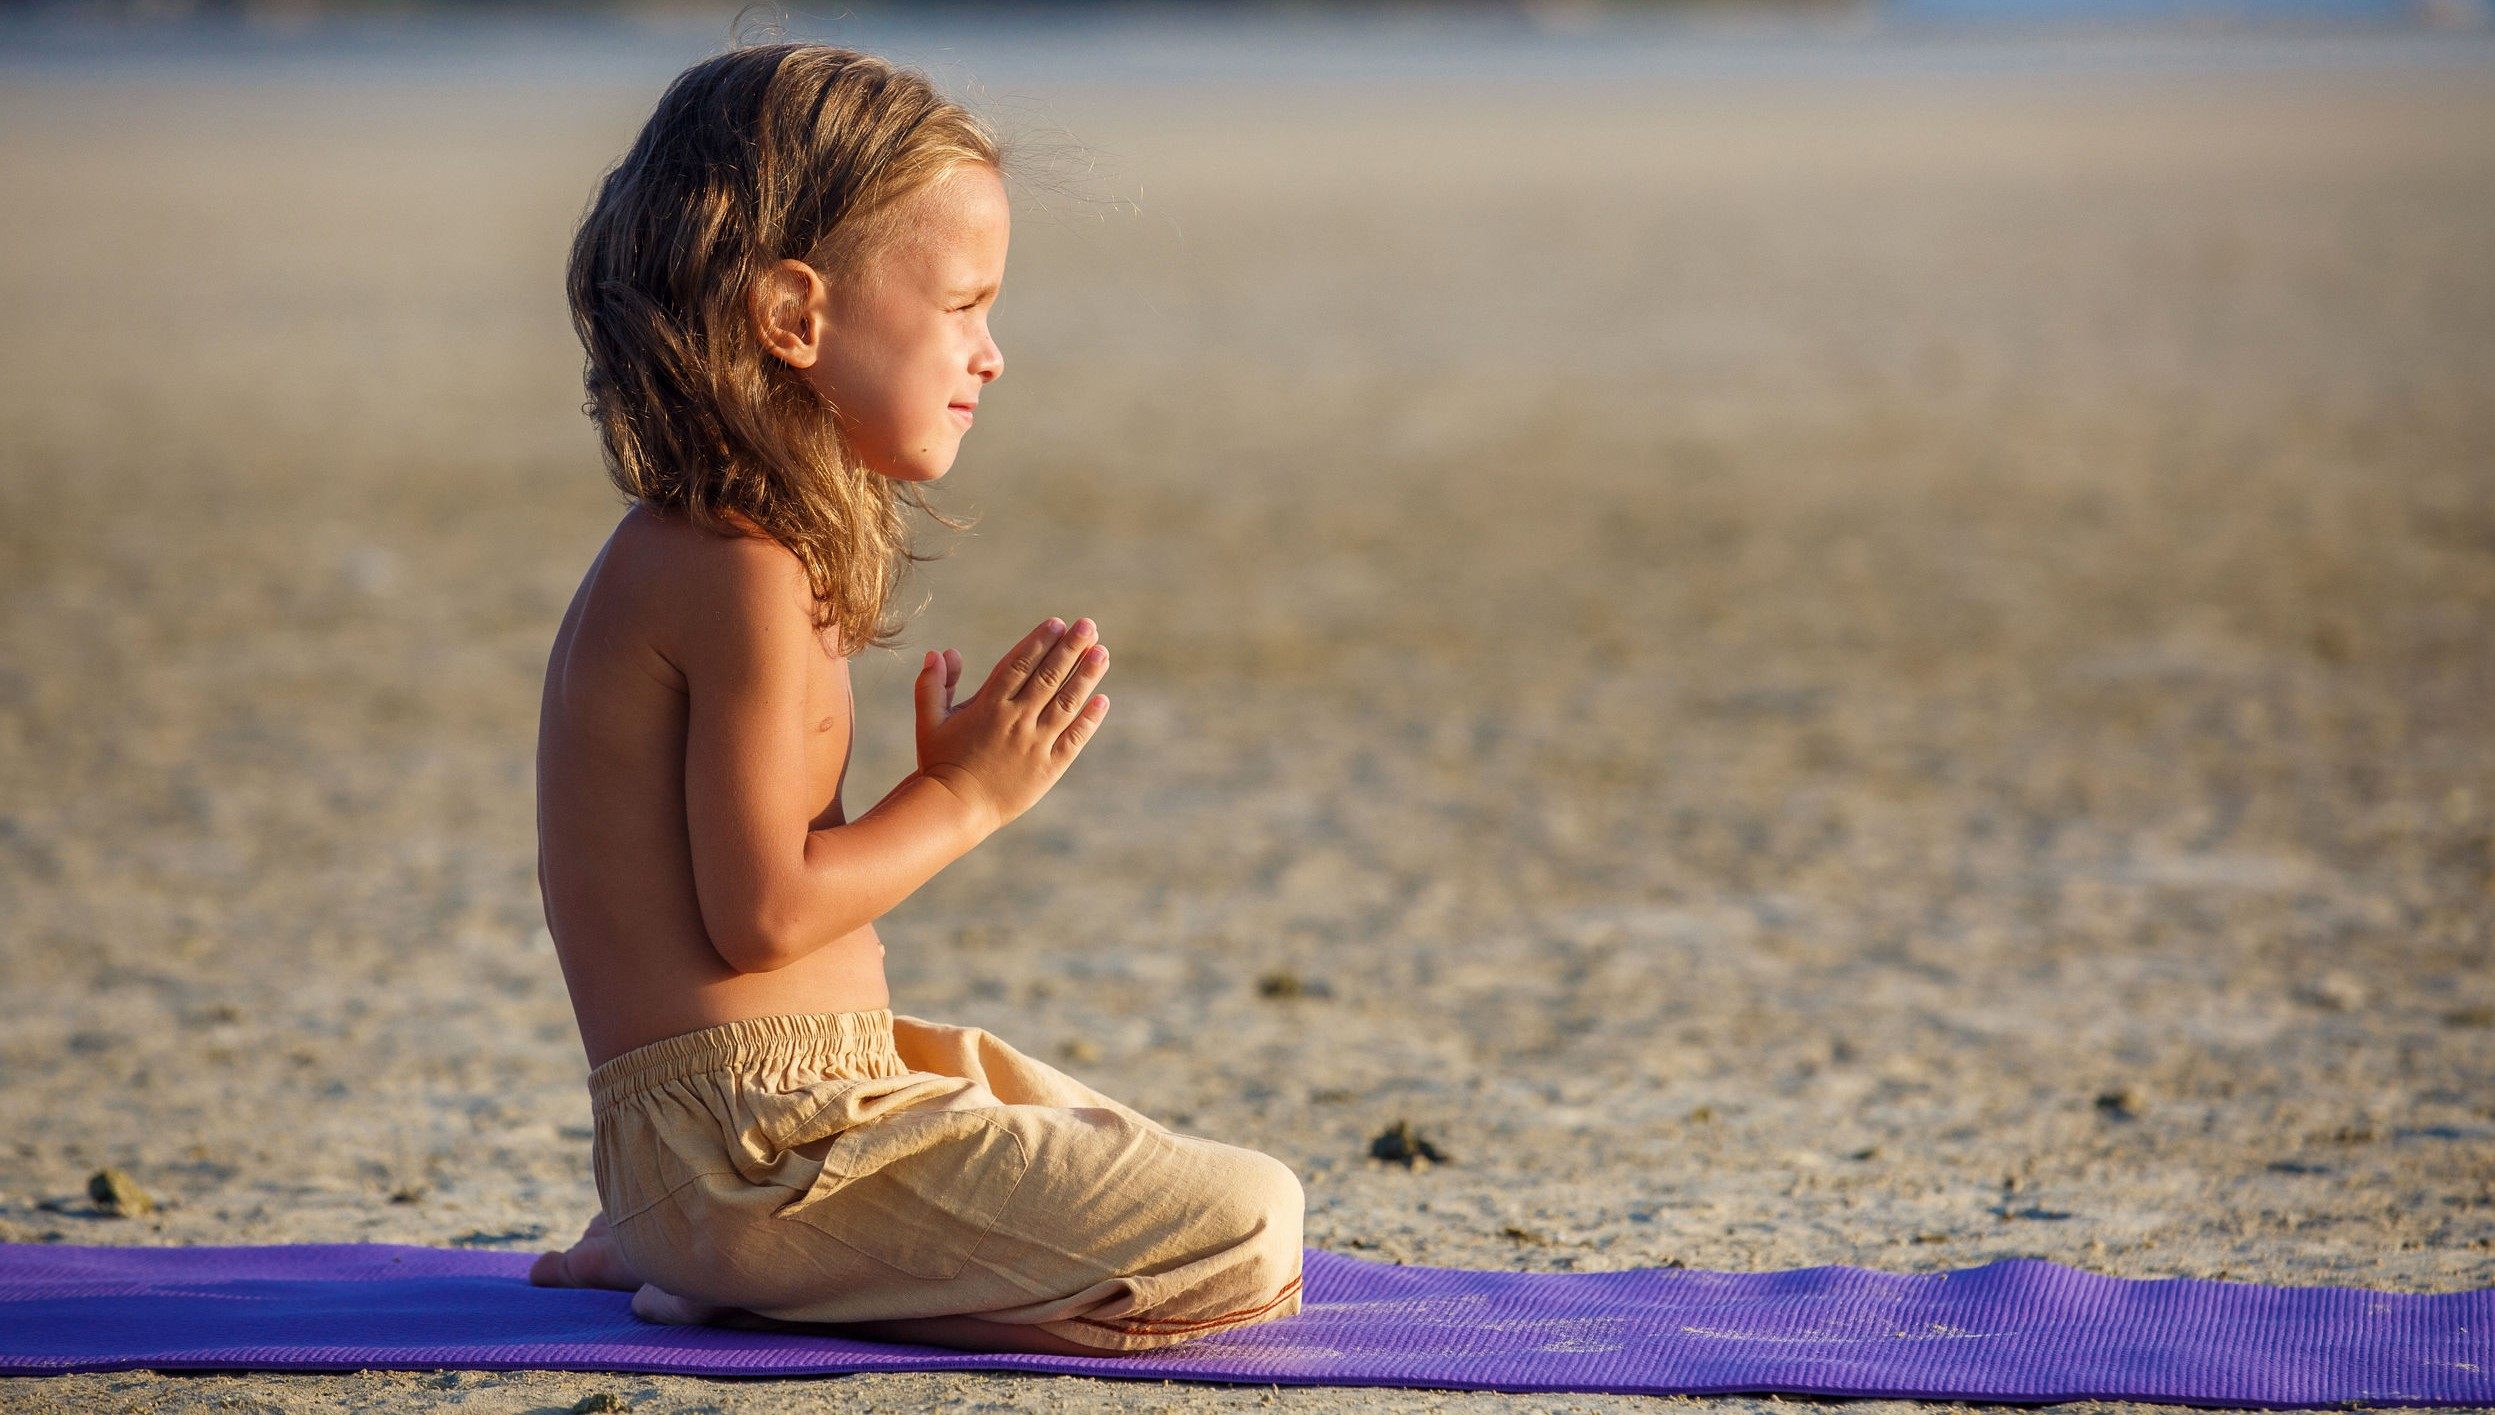
If this kid can do Yoga, so can you!
I don’t care if you’re at home, in a cubicle, or an office, I want you to use 3 minutes of courage to hold a few of the poses above!
Which ones? Find a quiet place and go through:
Even if you’re not interested in checking out NF Yoga and never attend a yoga class, try these four movements right now. Like, this very moment.
A big reason Nerd Fitness and the Rebellion are successful in getting people healthy is that we encourage people to take action immediately. Not tomorrow, not after breakfast, RIGHT NOW!
Try to hold each of the following positions for 30 seconds. Yes, even if you’ve never done yoga before and have no intention of doing it again… I’m challenging you to give this a shot right now!
I personally get up every 15-20 minutes and go through a few movements (Downward Dog is my favorite) to stay limber.
Crushed those four poses? Take it to the next level and run through our full sequence from the Water Series. It’ll take you a little over 20 minutes.
Want a little more help getting going?
You got it!
I have three great options on how you can continue your journey with us:
Option #1) Liked the yoga videos contained in today’s guide? Want to follow them in an app that also allows you to build your own superhero?
Then check out Nerd Fitness Journey!
Our fun habit-building app helps you exercise more frequently, eat healthier, and level up your life (literally).
Plus, you can join our Yoga Adventure so you can learn poses and grow strong while battling wiley supervillians!
Try your free trial right here:


Option #2) If you want a professional coach in your pocket, who can do video form checks, provide feedback, and adjust your workouts based on your experience level, check out our 1-on-1 Online Coaching Program!
For example, let’s say you have an old injury and couldn’t perform one of our flexibility exercises. A Nerd Fitness Coach can work with you to create a customized routine for your exact situation.
Personally, I’ve been working with the same online coach since 2015 and it’s changed my life. You can learn more by clicking on the box below:
Option #3) Become part of the Rebellion! We need good people like you in our community, the Nerd Fitness Rebellion.
Sign up in the box below to enlist and get our Rebel Starter Kit, which includes all of our “work out from home” guides.
Alright, your turn:
I’d love to hear from you: did you REALLY complete the 4-movement yoga routine above? And where did you do it? An office? In your cubicle?
Remember, who cares if your coworkers think you’re weird – getting judged for doing something healthy is a badge of honor you should be proud of!
…and Downward Dog!
-Steve
PS: If you want some tips on how to increase your mobility, check out The Ultimate Guide for Improving Flexibility.
###
All photo sources can be found right here.[12]